Craftsman garage door openers are reliable ceiling-mounted units, but even these sturdy systems can develop problems over time. If your Craftsman opener isn’t working as it should, you’re not alone – common issues like a door that stops closing or a remote that won’t work often have simple fixes. This guide breaks down the key steps you can take at home to diagnose and start fixing your Craftsman garage door opener efficiently. We’ll cover checking safety sensors, replacing remote batteries, testing door balance, and more. With some basic tools and a bit of patience, many Craftsman garage door opener fixing problems can be resolved without calling a technician.
Fixing Craftsman Garage Door Opener: Common Problems and Initial Checks
Most Craftsman openers made since the 1990s share similar design and features (they are made by Chamberlain). Before diving into repairs, do a quick walk‑through of the basics: make sure the door’s manual lock (if any) is off, and confirm the opener is plugged in and the circuit breaker hasn’t tripped. If the opener has an interior light, note whether it comes on when you press a button. If nothing powers up, start by resetting power to the unit. Unplug the opener for about one minute and then plug it back in. This simple power reset can clear minor electronic glitches. After resetting, if you still have problems, proceed with the specific checks below.
Fixing Craftsman Garage Door Opener: Safety Sensor Issues
Fixing Craftsman Garage Door Opener: Checking and Aligning Safety Sensors
Most Craftsman openers use two safety sensors (photo eyes) mounted near the floor on either side of the door. They send an invisible infrared beam between them. If the sensors are misaligned or blocked, the opener will refuse to close the door or will reverse immediately. To troubleshoot this:
- Check Sensor Lights: Look at the LED indicators on each sensor. They are usually green when aligned. When properly aimed at each other, both LEDs should be steady (not blinking). If a light is blinking or one is off, gently loosen the sensor’s bracket and turn it until the light stays solid.
- Align the Sensors: Each sensor must face straight across at its partner. Adjust them so they are directly opposite each other, at the same height (no more than 6 inches above the floor). Small shifts can cause problems, so take your time centering them.
- Inspect the Wiring: Check the thin wires running from each sensor back to the opener. If a wire is broken, pinched, or disconnected, the sensor will not work. Repair any damaged wiring before testing the sensors again.
- Test the Sensors: After adjusting, press the wall button or remote to close the door. If the door still does not close, try manually covering one sensor eye. With the beam blocked, the door should not close (it should reverse). Removing the blockage should then allow the door to close. If this test fails, further alignment or cleaning is needed.
If the door still misbehaves after these steps, power‑cycle the opener: unplug it for a minute and plug it back in. This resets the electronics and can clear false error conditions. Often, properly aligned sensors will then allow the door to operate normally.
Fixing Craftsman Garage Door Opener: Cleaning Safety Sensor Lenses
Over time, the sensor lenses can get dirty or foggy. Dust, spider webs, or even moisture can interrupt the infrared beam. To clean them:
- Wipe the Lens: Gently clean the small glass lens on each sensor with a soft, dry cloth. Don’t use harsh chemicals or abrasive materials. Even fingerprints can dim the beam.
- Remove Obstructions: Make sure nothing is in the path of the beam – no trash, leaves, or tools. The area directly between the sensors (under the door) must stay clear.
- Check Sunlight: If one sensor faces direct sunlight in early morning or evening, the intense light can trick it. Try temporarily shading the sensor to see if the door closes properly. If so, reposition that sensor or install a shade.
After cleaning, test the door again. If it still reverses, repeat the alignment steps. In most cases, straightening and cleaning the sensors fixes “door reversing” issues.
Fixing Craftsman Garage Door Opener: Remote Control and Battery Issues
Fixing Craftsman Garage Door Opener: Replacing Remote Batteries
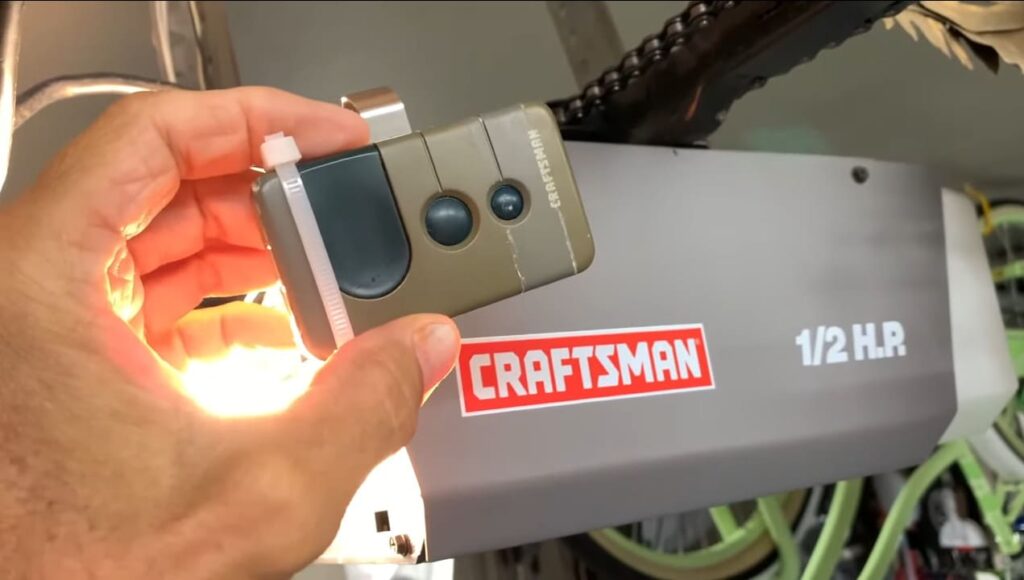
When a Craftsman remote control stops working, the first thing to try is changing its battery. Most Craftsman garage door remotes (visor or keychain models) use a 3‑volt CR2032 lithium coin battery. To replace it:
- Open the Remote: Look on the back of your remote. Some have a small sliding panel, others snap open with a screwdriver. Gently open the case.
- Install a New Battery: Remove the old CR2032 battery. Insert a fresh CR2032, making sure the positive (+) side is facing the direction shown inside the case. A common rule: the “+” side (usually labeled on the battery) should face up when the remote is closed.
- Secure the Remote: Close the case and make sure it clicks shut. Check that no wiring has come loose inside.
- Test the Remote: Stand about 10 feet from the door and press the button. If it works, you’re done. If not, ensure the battery is oriented correctly and try again.
A fresh battery often brings the remote back to life. If the opener’s receiver was getting a weak signal, the new battery restores full power. If you replaced the battery and the remote still doesn’t operate the door, proceed to reprogramming or check for signal issues (below).
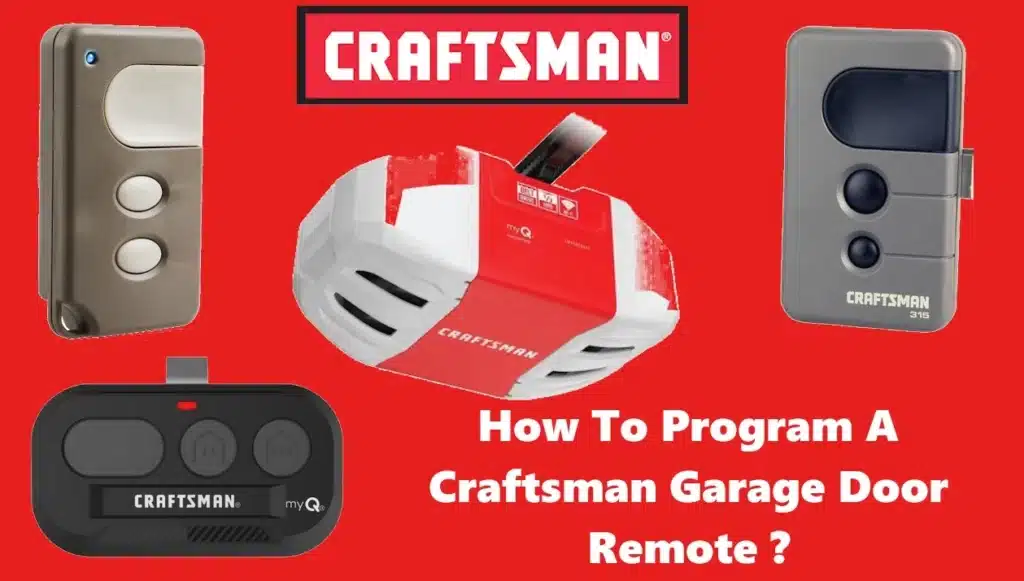
Fixing Craftsman Garage Door Opener: Reprogramming Remote Controls
Sometimes replacing the battery can cause the remote to lose its programming. If your Craftsman opener won’t respond to the remote after a battery change, follow these reprogramming steps:
- Locate the Learn Button: On the opener motor (mounted on the ceiling) there is usually a small “Learn” or “Program” button. This is often behind a light cover or near the antenna wire. It might be yellow, purple, or red.
- Activate Learning Mode: Press and release the “Learn” button. An LED next to it should light up (often for 30 seconds).
- Press the Remote Button: Within those 30 seconds, press the button on the remote you want to program. The opener’s LED should blink or go out, indicating the remote signal was learned.
- Test the Remote: Press the remote button again. The door should move. If not, repeat the steps or consult your opener’s manual for model-specific instructions.
A correctly reprogrammed remote will control the door like before. If reprogramming doesn’t work, try a different outlet for the opener (to reduce electrical noise) and ensure the antenna wire is hanging down unobstructed.
Tip: Other wireless devices can sometimes interfere with your remote signal. Keep the opener’s antenna clear of metal or thick walls. Relocating Wi-Fi routers or cordless phone base stations away from the opener may help avoid interference.
Fixing Craftsman Garage Door Opener: Door Balance and Manual Operation
Fixing Craftsman Garage Door Opener: Testing Door Balance
Your garage door springs do most of the heavy lifting, but the opener helps move it. If the door is out of balance, the opener may strain, run inconsistently, or refuse to close. To check the balance:
- Pull the Emergency Release: Disengage the opener by pulling the red emergency release cord (usually hanging from the opener’s trolley). This frees the door to move manually.
- Lift the Door Manually: Carefully lift the door by hand. Go up slowly until the door is about halfway open, then let go.
- Observe the Door: A properly balanced door will stay in place by itself (held up by the springs). If the door slowly falls or lifts on its own, the balance is off. If it feels very heavy or very light, adjust.
If the door does not hold its position, the springs need adjustment. DO NOT try to adjust the springs yourself – they are under extremely high tension and can be very dangerous. Instead, mark this as an issue for a professional. A balanced door is crucial; unbalanced doors can overload the opener or cause the door to slam shut unexpectedly.
Once you’ve tested balance, re-engage the opener by pulling the cord toward the opener head or lifting the door fully (depending on model). The opener’s chain or belt will reconnect, and you can try using the controls again.
Fixing Craftsman Garage Door Opener: Using the Manual Release Cord
When the opener won’t operate and you need to open the door (for example, during a power outage), you can use the manual release:
- Ensure Safety: Make sure the door is closed when you pull the red cord, or it may drop suddenly. Stand aside as you pull it down.
- Open/Close Manually: With the opener disengaged, you can lift the door manually. It should move smoothly if the springs and cables are working correctly.
- Re-engage the Opener: To reconnect the opener to the door, generally lift the door all the way up until the opener’s mechanism snaps back in place, or pull the cord in the opposite direction. The door will now again be controlled by the opener.
The red release cord is a lifesaver for emergencies. Always guide the door by hand when it’s disengaged to prevent it from falling. If the opener’s electronics are fixed or power is restored, remember to reconnect the opener before normal operation.
Fixing Craftsman Garage Door Opener: Power, Reset, and Maintenance
Fixing Craftsman Garage Door Opener: Checking Power Supply
Before anything else, make sure your opener has power. If your opener isn’t running at all (no lights, no sound), check the basics:
- Power Outlet: Verify the opener is plugged into a live outlet. Plug in a lamp or use a voltage tester on the same outlet to ensure it’s energized. Reset any tripped breakers or replace any blown fuses in your home electrical panel.
- Power Cord and Connections: Examine the opener’s power cord. If the cord is frayed or damaged, it can prevent the unit from powering on. Also, press the plug fully into the outlet – a loose connection can cause intermittent power.
- Wall Switch: If the wall-mounted wall switch doesn’t work but the remote does, check the wiring of that switch. Loose wires or a bad switch can stop the door. However, if no controls work, focus on outlet and cord first.
If the unit has power but still won’t respond, the opener’s internal electronics may need a reset.
Fixing Craftsman Garage Door Opener: Performing a System Reset
Sometimes the opener’s circuit board glitches and needs a full reset. To do this safely:
- Unplug the Opener: Disconnect the opener from the power outlet. Wait at least 30–60 seconds.
- Plug It Back In: After waiting, plug the unit back in.
- Observe the Lights: The opener’s lights may flash or the motor may briefly hum. This is normal. Now try the door controls again.
This power cycle clears the opener’s memory of any transient fault. If the door still won’t operate after a reset, the problem may be more serious (like a burned-out motor or electronics). At this point, consider professional service or testing individual components (sensors, wiring, etc.) again.
Fixing Craftsman Garage Door Opener: Lubrication and Hardware Maintenance
A little routine maintenance can keep your opener running quietly and prevent problems. Craftsman (and other) openers benefit from:
- Tightening Hardware: Over time, bolts and screws can loosen from vibration. Periodically tighten all nuts and screws on the opener’s bracket, rail, and on the door itself (hinges, rollers, track mounts). Loose hardware can cause rattling, binding, or uneven operation.
- Lubricating Moving Parts: Apply a garage-door lubricant (not WD-40 or automotive grease) to metal rollers, hinges, the chain or screw drive, and bearing plates. Use a light coating – you just want a thin film of lubricant on each pivot point or roller wheel. This reduces friction and noise.
- Checking Rollers and Tracks: Inspect the rollers (the wheels on the door) and the tracks they run in. Clean out any debris in the tracks. If a roller is visibly worn (rusty or cracked), replace it. Proper rollers and clear tracks make the door glide smoothly.
- Monitoring Door Operation: Each year, disconnect the opener (as in the balance test) and operate the door by hand to feel for any sticking points. This exercise helps you notice if something is binding. Also test the auto-reverse safety by placing an object (like a 2×4) on the floor under the door – it should reverse when it hits the object.
Keeping all parts well-maintained prevents extra strain on the opener. A stiff or noisy mechanism is harder for the opener to move. By tightening loose hardware and applying lubricant to key parts, you often eliminate squeaks and jerks before they cause bigger issues.
With regular checks and these simple fixes, most Craftsman garage door opener problems can be solved at home. Always remember safety first: unplug the power before hands-on work, and leave spring repairs to the pros. Proper maintenance and careful troubleshooting will keep your Craftsman opener running smoothly for years to come.