
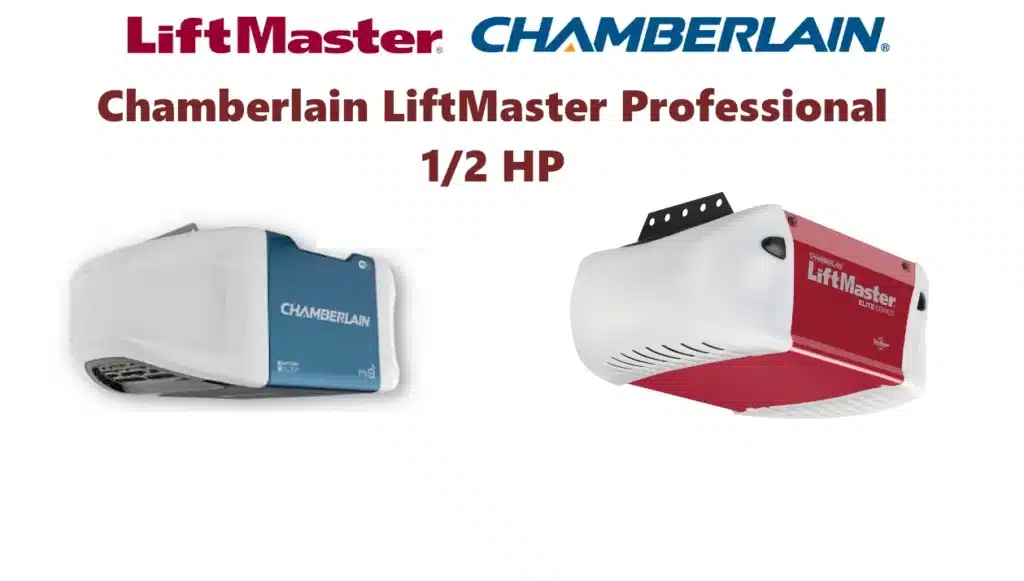
The Chamberlain LiftMaster Professional 1/2 HP is a dependable chain-drive garage door opener known for its reliable performance, easy remote programming with the purple Learn button, and secure 315 MHz rolling code technology. It’s built for smooth operation, supports multiple remotes and keypads, and is easy to maintain, making it a solid choice for most residential garages.
Chamberlain Liftmaster Professional 1 2 Hp Guide

Chamberlain Liftmaster Professional 1/2 Hp Learn Button
The Learn button (often called “Program” button) on a Chamberlain/LiftMaster opener is used to program and erase remotes and keypads. It is typically located on the motor housing, usually just above the antenna wire (a thin hanging wire). On the 41AC050-1M model, the Learn button is purple (indicating 315 MHz Security+). In some units it may be under the light lens or cover.
- Purpose: Pressing the Learn button puts the opener into a programming mode. Short press it, and the opener will “learn” the next remote or keypad signal. Holding it for several seconds will erase all stored codes.
- How to Use: To program a remote or keypad, press and release the Learn button, then within 30 seconds activate the remote or enter the keypad code. The opener’s learn LED will light steadily for 30 seconds, indicating it’s ready to receive a new code. When the opener’s lights blink (or you hear two clicks), the device has been learned. For example, programming a remote involves:
- Press and release Learn. The Learn indicator glows steadily for ~30 seconds.
- Press the remote button. Hold the remote’s button; when the opener blinks or clicks, release – the code is stored.
- Repeat for each remote. Each remote or keypad you wish to use must be programmed individually.
- Erasing Codes: To clear all remotes/keypads, press and hold Learn for about 6 seconds until the LED goes out. This erases all codes from memory. Then reprogram only the desired devices.
- Keypad Programming: Programming a keyless entry pad is similar: press Learn, then within 30 seconds enter a new PIN on the keypad and press ENTER. The opener lights will blink or go out to confirm the code is set.
Chamberlain Liftmaster Professional 1/2 Hp Programming Remotes
Adding a remote control to the 41AC050-1M opener is a simple process using the Learn button. The steps are:
- Step 1: Press and release the purple Learn button on the opener. Its indicator LED will glow steadily (about 30 seconds).
- Step 2: Within 30 seconds, press and hold the button on your remote that you want to use to operate the door.
- Step 3: When the opener’s lights blink (or you hear a click), release the remote button – the opener has learned the code. Two lights blink if bulbs are removed.
- Step 4: Test the remote. If it doesn’t work, repeat the above steps.
- Multiple Remotes: Repeat Steps 1–3 for each additional remote.
- Erasing Codes (optional): If you are replacing all remotes, first erase existing codes by holding Learn for ~6 seconds until its LED goes out. Then reprogram each new remote.
- Keypad (PIN) Codes: If you have a wireless keypad, program it similarly. For example, press Learn, then enter a new 4-digit PIN on the keypad and press ENTER. The opener lights will blink or go off to confirm the new PIN.
- Features: The wall-mounted control panel often has a “Lock” switch or button (child/vacation lock). If this light is flashing yellow, it means the lock mode is engaged – flip or hold the Lock switch until the flashing stops. This feature prevents any remote or keypad from opening the door until unlocked.
The official manual also explains programming in detail (see pages 31–32 for remotes and page 32 for keypads).
Chamberlain Liftmaster Professional 1/2 Hp Frequency
The LiftMaster 41AC050-1M uses Security+ 315 MHz rolling-code technology. This means:
- Radio Frequency: 315 MHz (megahertz) is the carrier frequency. It transmits digitally encrypted rolling codes that change with every use. The purple Learn button on the opener is a giveaway (purple = 315 MHz Security+).
- Compatibility: Only remotes/keypads built for 315 MHz Security+ will work. For example, LiftMaster’s 1-button 371LM and 3-button 893MAX remotes are designed for purple-button openers. Older fixed-code remotes (390 MHz) will not work on this opener.
- Checking Frequency: If you see a purple Learn button, it’s 315 MHz Security+. (Red/orange Learn buttons would be 390 MHz fixed code, which is not used on this model.) Some openers also support MyQ or “MAX” series; in any case the 41AC050-1M board only speaks 315 MHz Security+.
- Interference: 315 MHz is rarely subject to interference from household devices (it’s far from Wi-Fi, phones, etc.). However, if multiple openers or nearby gates use 315 MHz, use unique remotes or codes. The rolling-code system prevents code-grabbing by attackers.
- Changing Frequency: The frequency cannot be changed by the user – it is set by the circuit board. To switch to a different frequency you’d need a different logic board.
- Surge Protection: Electrical surges can damage the opener’s board. It’s recommended to use a LiftMaster 990LM surge protector on the same outlet. This safeguards the 315 MHz radio receiver and electronics from lightning or spikes.
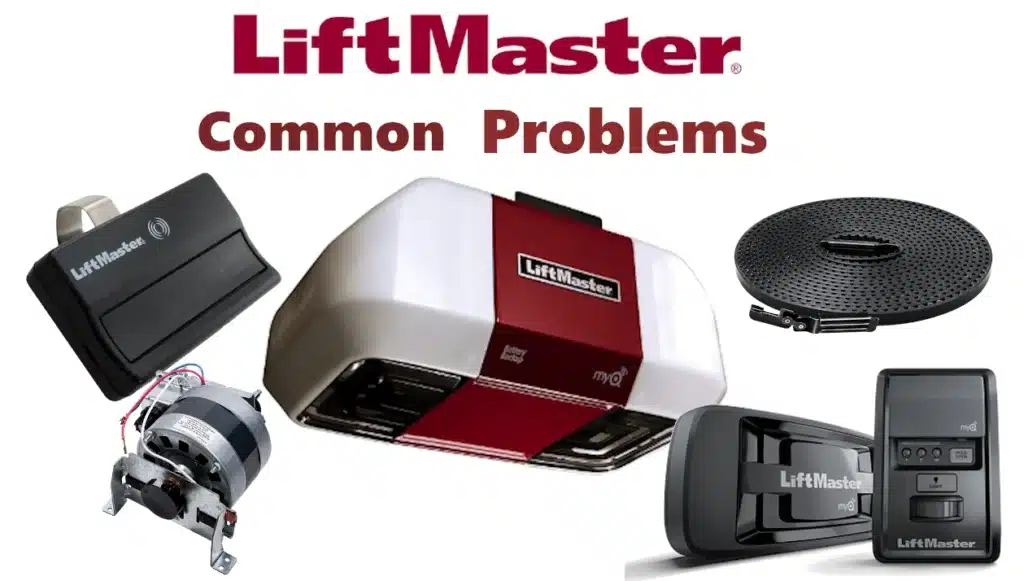
Chamberlain Liftmaster Professional 1/2 Hp Parts and Components

While we don’t have a picture here, the 41AC050-1M opener is a typical chain-drive unit. Its main parts and their functions include:
- Motor Unit (Powerhead): The main housing contains the AC motor, circuit board (receiver logic), light bulbs, and Learn button. When powered, the motor turns the drive gears.
- Drive Gear Assembly: Inside the motor, a worm gear (worm screw and worm wheel) transfers motion to the helical drive gear. The drive gear engages the chain’s sprocket. Worn or broken drive gears will produce grinding noises or failure to move.
- Chain and Rail: A steel I-beam or T-rail runs from the opener to the door. A roller chain loops around a sprocket on the motor end and a trolley on the door end. When the motor turns, it pulls the trolley along the rail to open/close the door. Proper tension on the chain (not too tight or loose) is important for smooth operation.
- Trolley and Door Bracket: The trolley (or carriage) rides on the rail and connects via a short arm to a bracket on the garage door. This physically moves the door when the opener runs. The emergency release rope/handle attaches to the trolley to disengage it for manual operation.
- Limit and Force Adjustments: On the opener housing there are limit adjustment screws (marked “Up” and “Down”) and a force adjustment. These set how far and how strongly the door moves. The manual explains how to adjust these for proper travel and safe reversal.
- Safety Sensors (Protector System): Two photo-eye sensors (often mounted 6 inches above the floor, one on each side of the door) form the safety beam system. If anything interrupts the beam while closing, the door will reverse. These must be wired to the opener and aligned properly. The manual emphasizes installing and aligning these sensors for safe operation.
- Wall Control (Push Button) and Keypad: The wall station inside the garage lets you open/close the door and may include a lock switch. An exterior keypad (optional) allows entry via a PIN. Both transmit to the opener’s radio receiver.
- Antena Wire: A thin wire hanging from the motor head is the antenna for the remote control signal. It should hang straight down for best reception.
- Lights: The opener has two built-in light sockets (for 100W bulbs, or LED replacements). These turn on when the door is activated or via a wall button with a light timer feature.
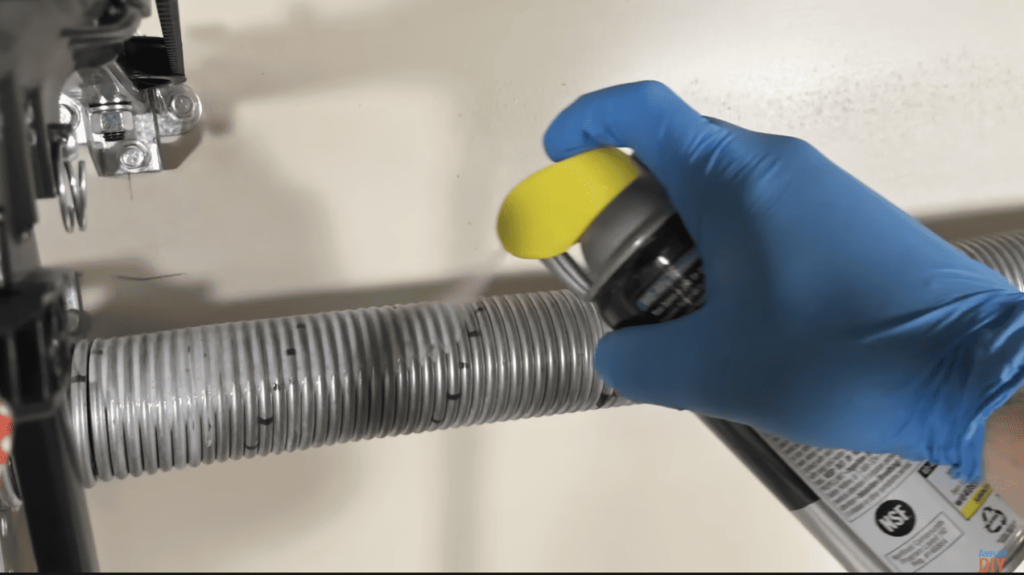
- Other Components: Overhead door parts such as torsion springs, cables, and tracks are not part of the opener but are essential for proper door balance. The opener links to the door via the arm. In maintenance, lubricate the chain (if required) and check cables/springs regularly.
Chamberlain Liftmaster Professional 1/2 Hp41AC050-1M Manual
The official installation/operation manual for the 41AC050-1M is very thorough. Key points include:
- Safety First: Read all safety warnings. The manual covers safe installation and usage (e.g. don’t let children play with remotes, test the auto-reverse system every month). It shows placement of warning labels on the door and control.
- Tools and Parts List: It details required tools (wrenches, screwdriver, ladder) and provides an inventory of hardware in the carton, helping you check that all pieces are present.
- Planning: Guidance on where to mount the opener (distance above door, mounting locations), and how to plan for wiring the wall control and sensors.
- Assembly: Instructions for attaching the rail to the powerhead and to the header bracket, and for installing the chain on the sprocket. The manual has diagrams for each step.
- Installation: How to install ceiling/bracket mounts, header bracket above the door, hang the opener on joists, attach the door arm to the trolley, and connect the wall control and sensors. It includes wiring diagrams for the terminal block (door control and sensors wiring).
- Adjustment: Critical steps to adjust limit switches (how far to travel up/down) and force settings so the door stops reliably without excessive force. After adjustment, you must test the auto-reverse function as per UL 325 safety standards. For example, placing a 1-inch board on the floor should cause the door to reverse upon contact.
- Programming: As noted above, programming remotes and keypad (pages 31-32) is covered. The manual shows exactly which buttons to press. It also explains how to erase codes if needed.
- Operation Tips: How to use the opener normally – push the wall button to open/close, or use a remote/keypad. It reminds users to secure the door by fully lowering it. It also advises manual operation via the release handle in case of power failure.
- Troubleshooting: Common issues (door won’t move, doesn’t close, lights blink) and diagnostics chart are provided at the end of the manual (page 30). For example, it lists LED blink codes and corrective actions.
- Maintenance: Recommends periodic inspection of hardware and safety features. Specifically, “Test the safety reversal system every month”, check sensor alignment, replace remote batteries annually, and keep moving parts lubricated if needed.
- Technical Specs: The manual confirms this is a ½ HP AC chain-drive unit, running on 120VAC (no battery backup for this model). The rail style is a solid “T” rail. It also details warranty information (4-year motor, 1-year parts from the Chamberlain Group, per industry standards).
Overall, the manual should be closely followed during installation for safety and proper functioning.
Chamberlain Liftmaster Professional 1/2 Hp Remote Replacement
If your remote control is lost or broken, you can replace it with a compatible model. For the 41AC050-1M (purple Learn button, 315MHz Security+), compatible remotes include LiftMaster 371LM (1‑button visor remote) and LiftMaster 893MAX (3‑button visor remote). The 890MAX keychain remote (3-button) is also compatible. These have a purple color code or are explicitly labeled “315 MHz Security+.” Universal multi-frequency remotes (e.g. LiftMaster 953D) may also work but require careful setup. When purchasing, match the opener’s frequency: purple-button models need 315 MHz remotes.
Once you have a new remote, program it just like the originals (using the Learn button as described above). For example, press Learn on the opener, then press the new remote’s button to train it. There is no separate “replacement mode.” If you have a multi-button remote and only use one function, program it to any button. Keypads should also be reprogrammed if replaced. Always ensure the replacement remote is designed for “Security+ 315 MHz”; using the wrong frequency remote will not work at all.
Chamberlain Liftmaster Professional 1/2 Hp Gear Replacement
Chain-drive openers like the 41AC050-1M use nylon helical gears that can wear over time. Signs of worn gears include: a grinding or whirring noise when the door tries to move but doesn’t (motor sounds like it’s running but the door won’t open), the door moves very slowly or not at all, or the chain moves freely without lifting the door. You may also visually see bits of white plastic (gear material) or stripped teeth on the drive gear. All these indicate it’s time to replace the gear kit.
Replacement steps (general):
- Disconnect power. Unplug the opener to ensure no power is applied.
- Detach chain. Release tension on the chain by using the emergency release (pull the red handle) or adjusting the chain tension nut. Remove the chain from the sprocket on the gear assembly.
- Remove cover. Take off the light lens and unscrew the motor unit cover to access the gear housing . Remove any old grease.
- Replace gears. Liftmaster sells gear replacement kits such as part #041A2817 (drive gear kit) or 041C4220A (drive gear + worm gear kit). The kit usually includes the large drive gear (spur gear), the worm gear (screw), bushings, spring, and grease pack. Install the new gears following the kit’s instructions (position the spring, gear, and worm gear correctly).
- Reassemble. Grease the new gears with the provided lubricant. Reattach the cover and lens. Reinstall the chain on the sprocket and re-engage the trolley. Reattach the power arm to the door bracket.
- Adjust and test. Reconnect power. Reprogram all remotes (the opener lost power, so it forgot codes). Check that the limit and force settings are correct, and test the safety reverse system before use.
Always use genuine LiftMaster gear kits or OEM equivalents to ensure proper fit. Note that broken gears often result from excessive force or an unbalanced door; after replacement, verify the door moves smoothly by hand to avoid repeating the issue.
Chamberlain Liftmaster Professional 1/2 Hp Blinking Yellow Light
A blinking or flashing yellow LED on a LiftMaster opener or wall console indicates an error or status condition. Depending on where and how it blinks, it can mean different things:
- Wall Control Panel Flashing: A slowly flashing yellow light on the wall button typically means the opener’s lock mode (vacation mode) is engaged. In this mode, no remote or keypad will operate the door. To reset it, flip open the wall panel cover and press and hold the “Lock” button until the light stops flashing. (This matches user reports that flashing stops when the lock is disabled.)
- Opener Learn LED Blinking: If the yellow Learn indicator on the motor head blinks a certain number of times, it is a built-in diagnostic code (on these units, a yellow LED usually sits next to Learn). According to LiftMaster support guidance and user experience, 5 blinks typically mean the opener isn’t detecting motor rotation (RPM sensor error) or the motor is overloaded/stalled. In other words, the gears aren’t turning properly. Possible causes include a jammed door, stripped gear, or a faulty RPM sensor. The typical fix is to unplug power for 30 seconds and retry, but if the problem persists, the motor or sensor may need replacement.
- Flashing Light (Multiple Causes): In general, “blinking lights” often indicate one of a few conditions: the safety lock is engaged (as above), the safety sensors are misaligned or obstructed, or there is a wiring problem with the sensors or control. Precision Door service explains that a flashing opener light can mean the safety lock is on, the sensors need adjustment, or there’s a wiring issue. So:
- Check that nothing is blocking the eye-level safety beams and that both photo-eye brackets are securely aligned and aimed at each other. Clean the lenses. If the sensors are misaligned or the wiring is loose, clear the problem and the blinking should stop.
- Ensure the door’s manual lock (if any) is off and the chain is engaged.
- Confirm the safety sensor LEDs are lit (green and red) on the sensors themselves.
- Unplug the opener briefly (sometimes a reset clears a fault).
- No Operation with Flashes: If your door will not move but the light blinks continuously, it likely means it refuses to close (e.g. sensor error). For example, if the eyes are misaligned, the opener’s light will flash and the door will not descend.
In summary, a blinking yellow often points to a safety or motor issue. First, count the flashes: five blinks = RPM/motor fault. Otherwise, check sensors, lock modes and wiring. Always refer to the opener’s diagnostic chart or manual. If troubleshooting at home doesn’t fix it, call a professional technician.
Chamberlain Liftmaster Professional 1/2 Hp Model 3255
The LiftMaster 3255 (and 3255-2) is a close relative of the 41AC050 series. It is also a 1/2 HP AC chain-drive garage door opener. According to LiftMaster dealers: it uses a 110 VAC motor (no battery backup) and comes with rolling-code 315 MHz remotes. Key specifications include:
- Motor & Drive: ½ horsepower, industrial-grade chain drive for reliable performance.
- Remote Technology: Security+ (315 MHz) rolling-code remote(s) are included. Each use generates a new code out of billions.
- Lighting: Built-in 100-watt interior lights (two bulbs). The opener meets UL325 safety requirements and includes a light timer feature.
- Limit Safety: Automatic reversing system (sensors and force limit). The opener meets all required safety standards for residential use.
- Warranty: 4-year warranty on the motor, 1-year on remaining parts.
- Accessories: Compatible with wireless keypads and LiftMaster MyQ smart control if a Wi-Fi gateway is added.
Usage & Maintenance: Operate it via the wall control or remotes. Always test the auto-reverse monthly by placing a 1″ board on the floor under the door (the door should reverse on contact). Check and realign the safety sensors (photo eyes) regularly. Replace the interior light bulbs when they burn out. Lubricate the chain and door hardware annually for smooth, quiet operation.
Troubleshooting: The 3255’s manual (available from LiftMaster) includes sections on troubleshooting. Common fixes are the same as other models: realign sensors, reprogram remotes, adjust limits. If the opener exhibits a blinking light, the diagnostics are similar to above (5 blinks = no RPM, etc.). Ensure the door is balanced and moves freely, or the opener may struggle.
By following the official manuals (for the 3255 and for the opener’s circuit board) and basic maintenance, the LiftMaster 3255 should provide years of trouble-free operation in a typical residential garage.
I need the safety reverse sensors for a chamberlain liftmaster professional garage door opener model 1280R, serial # 03312101111 purchased in 2001. Do you have these sensors and if so what is the price?
Regards,
Doug Osterrout
Dost1224@yahoo.com
248-321-6287