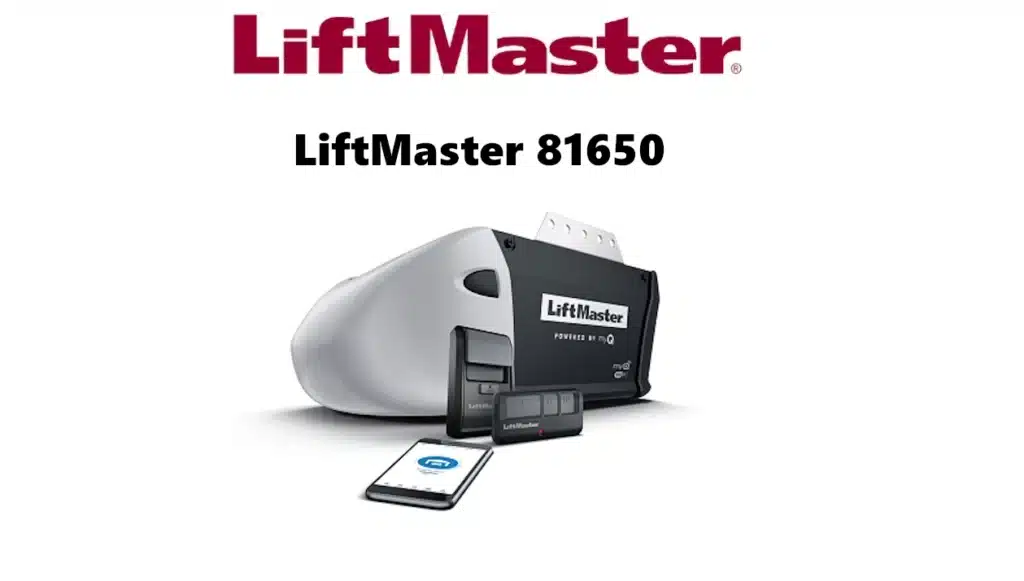
The LiftMaster 81650 is a contractor-grade residential garage door opener featuring a ½ HP AC motor and an industrial-strength chain drive. It comes with built-in Wi-Fi for smartphone control (via LiftMaster’s myQ app) and supports Amazon Key in-garage delivery. Key features include Security+ 2.0 rolling-code technology and PosiLock® security, as well as the Protector System™ safety sensors. This article covers its specifications, benefits, installation tips, programming instructions, maintenance, pricing, comparisons, and a final recommendation for homeowners.
Key Features and Specifications
The LiftMaster 81650 includes Wi-Fi connectivity for smartphone control (myQ) and a 3-button remote. Photo: homeowner using a smartphone to control a smart garage opener.
- Motor & Drive: It has a ½ HP AC motor with an industrial-strength chain drive, providing steady lifting power for standard single or double garage doors. The unit runs on 120V, 60Hz power and requires about 2 inches of additional headroom above the door (for the T-rail and opener).
- Connectivity: The opener has built-in Wi-Fi (no separate gateway needed) for smartphone control via the myQ® app. It supports myQ Diagnostics for real-time health monitoring. A multi-function wall control (LiftMaster model 882LMW) and a 3-button remote (893LM) are included.
- Safety & Security: The 81650 uses LiftMaster’s Protector System® infrared safety sensors to automatically reverse the door on obstruction. It employs Security+ 2.0 rolling-code encryption (new code each click) and PosiLock® deadbolt technology to secure the door. It also has an Alert-2-Close audible warning (with myQ) before a scheduled close via the app.
- Lighting: One 100-watt bulb (max) can be installed in the unit with adjustable on/off delay. It is compatible with CFLs (up to 26W).
- Warranty: LiftMaster Garage Door backs the opener’s motor for 4 years and the parts for 1 year. (By contrast, LiftMaster’s premium chain-drive model 8365W-267 offered a lifetime motor warranty.)
- Included Accessories: Package includes the T-rail (rail lengths vary by door height), safety reversing sensor kit, 3-button remote (893LM), and the 882LMW multi-function control panel. A hardware bag with installation bolts and brackets is also provided.
LiftMaster 81650 | Residential Garage Door Openers MANUAL
Benefits and Advantages
The LiftMaster 81650 offers a blend of performance and smart features suited for residential use:
- Smartphone Control (myQ): Homeowners can monitor and control the door from anywhere using the free myQ mobile app. You’ll receive status alerts and can operate the door via smartphone, tablet, or computer.
- Amazon Key Delivery: It supports Amazon Key In-Garage Delivery, allowing secure delivery of packages inside the garage (weather- and theft-protected) for Prime members. Real-time delivery updates can be managed through the app.
- Reliable Chain Drive: The chain-drive system is very robust and “provides smooth, steady performance year after year”. This makes it well-suited for heavier doors or high-cycle use. (Note: chain drives are noisier than belt drives, so install away from living areas if noise is a concern.)
- Strong Motor: The ½ HP AC motor will “support standard aluminum doors day after day”. It also uses about 75% less power in standby than older models, making it energy-efficient in daily operation.
- Advanced Safety: Built-in safety sensors and the Protector System® (photo-eyes) stop door motion on any obstruction, and rolling-code security with PosiLock® ensures secure operation.
- Easy Setup (with Bluetooth): The newer 81650 includes integrated Bluetooth in the control panel to simplify initial Wi-Fi setup for the opener and app connection.
- Warranty: A 4-year motor warranty (and 1-year parts) offers peace of mind, especially compared to typical 1–2 year warranties on cheaper models.
Together, these features give homeowners convenience (smart control and alerts) plus the dependability of a proven chain-drive opener. The embedded smartphone image above illustrates the convenience of myQ connectivity.
Installation Guide (Step-by-Step)
Installing a garage door opener can be done by a handy homeowner or a professional. Here’s a general step-by-step guide:
- Prepare the Opening: Ensure the door is properly balanced and the springs are in good condition. Install a header bracket centered above the door (usually 2″ above the top of the door) by screwing it into a solid header or beam.
- Assemble the Rail & Trolley: If required, assemble the T-rail sections and attach the trolley. Mount the rail to the motor unit (or slide the rail onto the trolley).
- Mount the Opener: Lift the assembled rail/opener and attach it to the ceiling joists using the included hanging brackets or straps. Adjust so the opener is level, and the trolley aligns with the door bracket.
- Attach the Chain/Belt: The chain (or belt on other models) should be placed around the sprocket on the motor and looped through the trolley. Adjust chain tension to the manufacturer’s spec (typically ¼–½ inch slack). Warning: Before adjusting chain tension, always disengage the trolley using the emergency release (pull the red handle) to avoid injury.
- Install Safety Sensors: Mount the two infrared safety sensors on each side of the door, about 4–6 inches above the floor, facing each other. Wire them to the opener (usually color-coded wires) and ensure their LEDs light up (indicating alignment).
- Install Door Control and Wiring: Fix the lift/bellwire from the opener to the wall control console (882LMW). Connect the wires, then mount the wall panel near the door entrance. Also install the emergency release handle (if provided) on the wall above shoulder height.
- Power Connection: Plug in the opener to an outlet (ensure dedicated circuit is used). Make sure no children or pets are near.
- Set Travel Limits: Using the “up” and “down” travel adjustment screws on the opener, set the limits so the door fully opens and closes without straining. Each time you adjust travel, cycle the opener once or twice until the limits are correct.
- Adjust Force (if needed): Test the automatic reverse feature by placing a 1½-inch board on the floor and attempting to close the door. It must reverse on contact. Adjust the close-force and open-force knobs if the door does not reverse reliably.
- Install Lighting: Put in a suitable garage light bulb (incandescent or CFL up to 26W) in the opener’s socket.
- Final Checks: Tighten all fasteners and test the emergency release by pulling the red cord (the door should operate manually). Ensure all travel and force settings work, and the door remains balanced.
(Tip: The manual specifies a 2″ overhead clearance is required, so confirm this space before mounting.)
Programming the Remote Control and Keypad
Programming Liftmaster Remote Control: To pair the included 3-button remote (893LM) with the opener, press and release the Learn button on the 882LMW wall console twice. The command LED will blink. Within 30 seconds, press and hold the desired remote button; release it when the opener lights blink or you hear two clicks. The remote is then programmed. Repeat for additional remotes if needed.
Programming Wireless Keypad: (Using LiftMaster’s Security+ keypad.) Press the Learn button on the wall console twice. When the console LED blinks, enter a new 4-digit PIN of your choice on the keypad and press ENTER. The opener lights will flash (or you’ll hear two clicks) to confirm programming. Test the keypad by locking up and entering your PIN to operate the door. (If programming fails, reset by pressing Learn on the console and try again.)
These wireless accessories are compatible with LiftMaster’s Security+ 2.0 system. All Safety Reversal and Sensor tests should be repeated after programming to ensure safety.
Compatibility and Maintenance
Compatibility Notes: The Liftmaster 81650 works with LiftMaster’s myQ smart-home ecosystem and Security+ 2.0 devices only. It is not compatible with older non-Security remotes or digital keypads. Also note this model has no battery backup – if power fails, the opener will not operate (though the manual release still works). In fact, California law forbids selling non-battery openers for new installations after 2019. Ensure your local codes allow its use. It is designed for sectional garage doors; do not use unattended auto-close features on a one-piece door. It is HomeLink®-capable (with an optional compatibility bridge for some vehicles).
Maintenance Tips: Regular upkeep will keep the opener running safely:
- Monthly: Operate the door manually and check for balance or binding; if it’s hard to lift by hand, a technician should adjust the springs. Test the safety reversal system every month (place a 1½″ board on the floor; the door must reverse on contact). Also test the photo-eye sensor beam alignment.
- Yearly: Oil the garage door’s rollers, hinges, and springs (the opener itself is pre-lubricated and needs no grease). Replace the light bulb and remote control battery (CR2032) as needed. Verify any battery backup (if you add one later) by testing that it can close/open the door during a power cut.
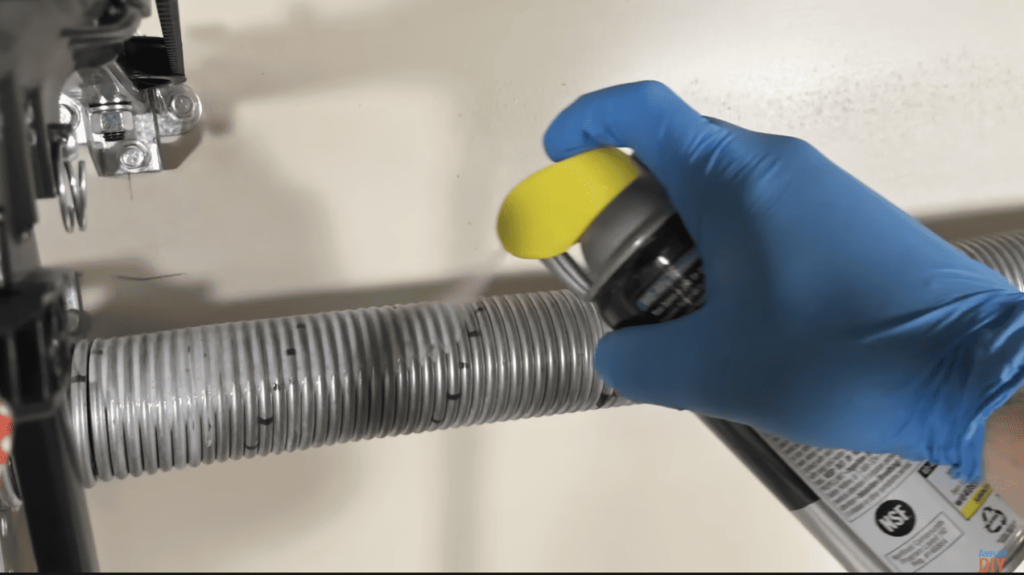
- Every 2–3 Years (T-Rail): Wipe the T-rail with a rag and apply a thin layer of white lithium grease to the top and underside of the rail where the trolley slides. This ensures smooth travel. If noise or chain slack becomes an issue, pull the emergency release and adjust the chain tension carefully.
Overall, schedule safety reversal tests and sensor checks regularly, and follow the manual’s safety guidelines to prevent accidents.
Pricing of Liftmaster 81650 and Model Comparisons
The Liftmaster 81650’s current retail price is in the $300–$400 range, depending on accessories and vendor. For example, one supplier lists a complete 81650 opener (with rail) for about $290, while a head-only kit goes for around $350. For comparison, the LiftMaster 8165W (an earlier, contractor-chain model) had essentially the same specs and was priced similarly when it was available. The premium chain-drive model 8365W-267 (now discontinued) was higher-end: it cost roughly $360 and included a lifetime motor warranty (vs 4 years on the 81650).
(For context, LiftMaster’s belt-drive models like the 83650-267 offer quieter operation and built-in battery backup, but they typically run about $50–$100 more.) The 81650 provides a balance of features and value: smart home connectivity and a rugged motor at contractor-level pricing.
Pros and Cons
Pros:
- Smart Control: Built-in Wi-Fi with myQ app lets you operate and schedule the opener remotely.
- Amazon Key Integration: Supports secure in-garage delivery for Prime packages.
- Strong Chain Drive: Durable and reliable for heavy doors, with a powerful ½ HP motor.
- Solid Security: Uses rolling-code remotes and PosiLock for safety; includes photo-eye sensors.
- Good Warranty: 4-year motor warranty is generous for this class.
- Affordable: Competitively priced for a contractor-series opener, often cheaper than premium models.
- Included Accessories: Comes with a modern multi-function control panel and remote (no need to buy extras).
Cons:
- No Battery Backup: Will not work in a power outage and thus is restricted in some regions (e.g. California ban).
- Chain Noise: The chain drive is louder than belt-drive models – this may be a drawback if the garage is beneath a living space.
- Limited Lighting: Only one incandescent/CFL bulb (max 100W) and no motion sensor light.
- Manual Setup: Setting up travel limits and forces can be fiddly for first-timers (though necessary on any opener).
- Warranty: 4-year motor warranty is good but shorter than the lifetime offered by higher-end models.
Overall, the benefits (smart features and dependable drive) outweigh the drawbacks for most homeowners who want a rugged, Wi-Fi-enabled opener. If you need super-quiet operation or backup power, consider a belt-drive model with battery (at a higher cost).
Recommendation
For homeowners seeking a reliable, feature-rich garage door opener on a reasonable budget, the LiftMaster 81650 is a strong choice. It pairs the proven durability of a chain-drive system and ½ HP motor with modern conveniences like smartphone control and Amazon Key compatibility. Installation is straightforward (especially with the included instructions and wall console), and the monthly maintenance is minimal (primarily sensor and balance checks).
Be aware that this unit lacks a battery backup, so it’s not suited for installations where power outages are a concern or where local codes require a backup. If noise is an issue, a belt-drive alternative (e.g. LiftMaster 8155W or 83650-267) might be preferred. Otherwise, the LiftMaster 81650 offers a good blend of performance, connectivity, and value. Its 4-year motor warranty gives added confidence in the product’s durability.