Maintaining your Chamberlain garage door opener is easier than you might think – and it pays off with a smoother, safer, and longer-lasting garage door system. Your garage door opener is part of one of the largest moving devices in your home, and like any mechanical system it needs a little TLC. In this step-by-step guide, we’ll walk through essential maintenance tasks – from lubricating the chain or belt to testing the safety sensors – all in a friendly, DIY homeowner tone. We’ll also highlight how often to do each task, suggest handy tools, and share safety tips along the way. Let’s get started!
Safety First: Preparing for Maintenance
Before diving into maintenance tasks, take a moment to ensure safety – yours and your garage door’s:
- Disconnect Power: Always unplug your garage door opener or switch off its circuit breaker before working on it. This prevents any accidental operation while you’re up on a ladder or have fingers near moving parts.
- Wear Basic Protection: It’s wise to wear safety glasses and work gloves, especially when handling springs, lubricants, or dusty parts. This will shield your eyes from debris and keep your hands clean.
- Avoid High-Tension Repairs: Never adjust or remove garage door springs, cables, or bottom brackets yourself – these are under high tension. If your door is unbalanced or binding, call a qualified technician instead of attempting risky fixes. (We’ll cover how to check your door’s balance safely in this guide.)
- Work with the Door Closed: For most tasks, it’s best to keep the garage door fully closed. This reduces the chance of the door moving and provides slack in the lifting mechanism. Use a sturdy step ladder to reach the opener unit comfortably.
By taking these precautions, you’ll set yourself up for a safe and successful maintenance session. Now, on to the tasks that will keep your Chamberlain opener running like a champ!
1. Chamberlain Garage Door Lubricating the Chains and Belts

Proper lubrication of your garage door opener’s moving parts – whether a chain-drive or belt-drive – is key to quiet, smooth operation and reduced wear.
Why: Over time, the metal parts of your opener and door (chains, rollers, hinges, etc.) can dry out or corrode, causing noise and added strain on the opener. Regular lubrication minimizes friction and helps your opener last longer.
How Often: Plan to lubricate at least twice a year (for example, every spring and fall). In harsh climates or heavy usage, you might even do it quarterly. A quick touch-up before winter and before summer is a good rule, since temperature changes can affect the door’s movement.
What You’ll Need: Use a garage-door specific lubricant (usually a silicone spray or white lithium grease). Avoid general WD-40 – that’s more of a cleaner than a long-term lubricant. Many hardware stores sell products labeled garage door lube. Grab a clean rag or paper towel as well to wipe off old residue.
Steps for Lubricating:
- Close the door and disconnect the opener: Unplug the opener for safety and pull the red manual release cord to disengage it from the door. This allows you to move the door or parts by hand if needed.
- Wipe off old grime: Using your rag, clean the drive chain or belt and other parts you’ll lubricate. Remove any old grease, dust, or cobwebs. (A clean surface helps the fresh lubricant work better.)
- Apply lubricant to moving parts: For chain-drive openers, spray a small amount of lubricant along the full length of the chain. Also hit the door’s hinges, metal rollers (with metal bearings), and the spring above the door with a light coat. For belt-drive openers, do not apply lubricant to the belt itself – most belts are rubber and don’t require grease. Instead, lubricate other metal-to-metal contact points: the hinges, rollers, and the rail/trolley where the belt’s trolley slides. (Chamberlain belt drives often have a rail grease applied at installation; you can renew this every couple of year.)
- Wipe off excess: You only need a thin film of lubricant. If it’s dripping or you sprayed too much, wipe off the excess with your rag. Excess lubricant can attract dust.
- Reconnect and test: Plug the opener back in and re-engage the trolley (typically by running the opener or manually sliding the door until it reconnects). Operate the door a few times to work the lubricant in. You should notice quieter, smoother movement almost immediately.
Pro Tips: Lubricate metal rollers and hinges, but keep lubricant away from plastic components (plastic rollers or belts don’t need it). Also, do not grease the tracks that the door rollers ride in. It might sound intuitive to lubricate the tracks, but don’t – clean tracks with a dry cloth or a bit of solvent if needed, but adding grease there can cause the door to slip or become misaligned by collecting dirt. The tracks should remain clean and dry. If you see debris in the track, wipe it out; if you hear squeaking from the rollers, that’s when a bit of lube on the roller bearings (not on the track) is helpful.
With your opener and door freshly lubricated, you’ll reduce strain on the motor and enjoy a much quieter garage door. Lubrication is one of the most beneficial maintenance tasks you can do – it’s quick, inexpensive, and makes a big difference.
2. Adjusting the Force and Limit Settings
Modern Chamberlain openers have adjustable settings that control how far the door travels and how much force the opener uses – tweaking these ensures the door opens and closes fully and safely.
Your Chamberlain opener’s limit settings determine how far the door goes up and down, and the force settings control how much force is applied (and when the opener senses an obstruction). Properly adjusted, these ensure the door fully closes on the ground, fully opens to the right height, and reverses correctly if it hits an object. Over time or after initial installation, you might need to fine-tune these.
Why: If your garage door doesn’t open or close all the way, or if it reverses mid-travel for no reason, it’s likely time to adjust the limits or force. Newer Chamberlain openers often self-calibrate force, but older models have manual dials. Ensuring these settings are correct is crucial for safety – too much force and the door might not reverse when it should, too little and the door might refuse to close if it “thinks” there’s an obstruction.
How Often: There’s no monthly chore here; just check the door operation periodically (say, every 3-6 months) and especially test the safety reverse each month (more on that in the sensor section). If you notice any changes in how the door moves or after doing other maintenance, you may need a quick adjustment. Also, if seasonal temperature changes make the door behave oddly (common in winter or summer), a slight tweak might help. As a rule of thumb, include a force/limit check at least twice a year during your maintenance routine.
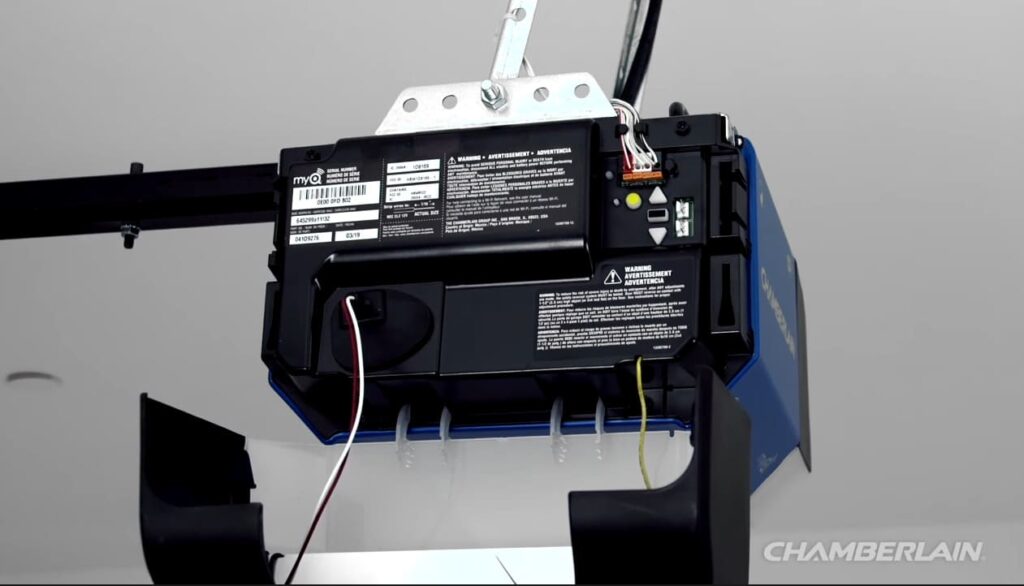
What You’ll Need: Typically just a step ladder to reach the opener and a flat-head screwdriver. Your Chamberlain opener will have limit adjustment screws (usually labeled ‘Up’ and ‘Down’) and possibly force adjustment dials (often labeled or indicated with arrows or numbers) on the unit. Consult your owner’s manual for exact locations – on many Chamberlain models, the limit screws are on the side or back, and force dials (if present) are nearby. Newer models with electronic controls might have adjustment buttons instead of screws.
Steps to Adjust Limit Settings (Door Travel):
- Identify the limit adjustment screws: Look on the opener motor housing for two plastic screws or dials, often labeled “Up (Open)” and “Down (Close)”. These control how far the door travels. Some Chamberlain models use a flathead screw, others might use a knob or an electronic arrow button – but the principle is the same.
- Adjust the down limit: If your door isn’t closing fully (stopping above the floor or reversing before hitting the floor), you’ll need to increase the down travel. Using your screwdriver, turn the Down limit screw clockwise in small increments (e.g. one turn or less). This tells the opener to move the door a bit further down. If the door is hitting the floor and reversing, you might have too much down travel – turn the screw counter-clockwise slightly.
- Adjust the up limit: If the door isn’t opening as high as you’d like (or stopping short), turn the Up limit screw clockwise to increase the travel upward. If the door tries to go too far (straining or pressing against the opener body), dial it back with a counter-clockwise turn.
- Test and fine-tune: Plug the opener back in (or use the remote) and run a full cycle test after each small adjustment. Observe the door’s stopping points. You may need a couple of tweaks to get it just right. The door should stop right at the floor on close (with the weatherstripping just compressed) and level with the opening (or your desired height) when open. Avoid setting the up-limit too high such that the door arm overextends or the door bangs into the opener – that can cause damage. Always finish by testing the safety reversal (place a roll of paper towels or a 2×4 on the floor and close the door – it should hit the object and reverse immediately). If it doesn’t, you may have set the down limit too far or need to adjust the force settings next.
Steps to Adjust Force Settings (Sensitivity):
- Locate force adjustment controls: On older Chamberlain openers, look for two dials or sliders labeled “Open Force” and “Close Force” or sometimes just up/down arrows (often on the back or side of the motor unit). They are usually numbered (1-9 or so). Newer models may not have manual force dials – instead, the opener auto-sets the force when you program the travel limits. (If you have a newer unit and it’s reversing unexpectedly, first redo the travel limits and the opener might self-calibrate the force. Only if issues persist would you consider a manual tweak, if possible.)
- Understand when to increase or decrease force: If the door reverses mid-close for no apparent reason (and sensors are clear), the down force may be set too low – the opener thinks the door hit an obstruction when it hasn’t. Conversely, if the door does not reverse when it should – say it closes on an object without stopping – the down force is too high, which is dangerous. For opening: if the door struggles to open or stops on the way up, you might need a bit more up force. The goal is to use the minimum force necessary to move the door smoothly, so always err on the lower side and adjust upward only as needed.
- Adjust the force dials in small increments: Using your flat screwdriver, turn the appropriate force dial slightly – typically clockwise to increase the force, and counter-clockwise to decrease. For example, if your door reversed during closing (false trigger), give the Down Force a small clockwise tweak to increase power. If the door didn’t reverse on the 2×4 test, do a significant counter-clockwise turn on Down Force to reduce it (because it should absolutely reverse when hitting an object). Change only one thing at a time, and test after each adjustment.
- Test the auto-reverse thoroughly: After adjusting force, perform the safety reverse test again by placing a solid object like a 2×4 under the door’s path. Close the door – it must reverse upon contact with the object. Also, try stopping the door with your hands (carefully) when closing – it should detect resistance and reverse. If it doesn’t reverse, immediately decrease the down-force setting and test again. Never increase the force to a point where the door won’t reverse – that’s a major safety hazard. Finally, ensure the photo-eye sensors are aligned (coming up next) because misaligned sensors can mimic force issues too.
Friendly Reminder: Always make small adjustments and keep testing. It might take a few back-and-forth turns to get it perfect, but this cautious approach prevents overdoing it. Also, do not exceed what’s needed – cranking the force up too high can be dangerous. Use just enough force so the door operates smoothly and always verify the auto-reverse works with an object test. When in doubt, lower the force and figure out if something else (like door balance or sensor alignment) is causing the issue.
Properly adjusting the force and limit settings ensures your garage door opener isn’t overworking and that it will stop and reverse when it should, protecting your family and belongings. It’s a critical safety step and part of routine tuning – one that many homeowners can do with just a screwdriver and patience.
3. Testing and Replacing the Backup Battery for Chamberlain openers
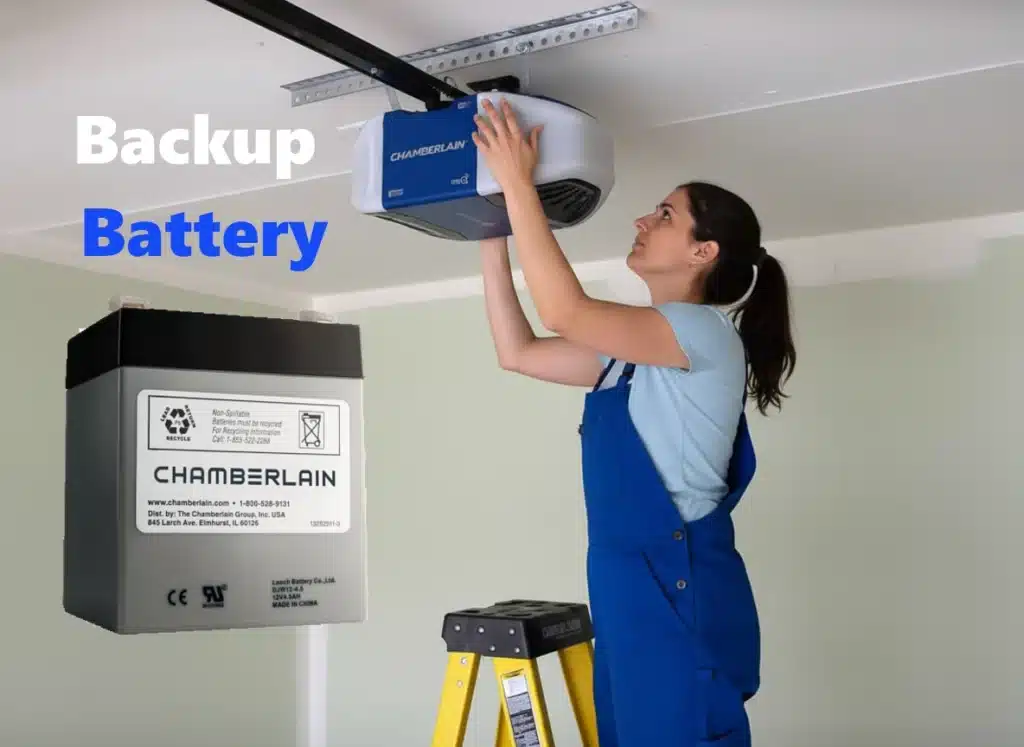
Many Chamberlain openers come with a battery backup feature – a small 12-volt battery that powers the opener during an outage. If your model has one (common in models with “Battery Backup” or if you live in areas like California where it’s required), it’s important to maintain this battery so your door will open even if the lights are out.
Why: A healthy backup battery gives you peace of mind that you won’t be locked in or out of your garage during a power failure. Like any battery, it needs occasional testing and replacement. Over time (usually a couple of years), the battery’s capacity drops and it won’t hold charge. Checking it ensures that when you need it, it works.
How Often: Test your opener’s backup battery twice a year (a good habit is to test when you change your smoke alarm batteries or at Daylight Savings time). Many Chamberlain openers will beep or display a flashing LED when the battery is low – don’t ignore those warnings. As for replacement, plan on replacing the battery roughly every 2 to 3 years, or when testing shows it’s weak. Most lead-acid opener batteries last 1-2 years under regular use. If you’ve had several power outages or extreme temperatures, the battery may wear out faster.
What You’ll Need: A replacement battery of the correct type (check your Chamberlain model; most use a 12V 5Ah sealed lead-acid battery, model number 4228 for many Chamberlain/LiftMaster units). You’ll also need a Phillips screwdriver to open the battery compartment, and possibly a small wrench if the battery terminals use nuts. Have a rag handy because sometimes there’s a bit of dust in the compartment. Also, if your battery is old and corroded, wear gloves.
Steps to Test the Battery:
- Unplug the opener to simulate a power outage: Close your garage door first. Then unplug the opener’s power cord. Now try opening the garage door using the opener (via remote or wall button). If the battery is working, the door should still operate (it may move a bit slower than normal, which is okay).
- Observe any signals: While running on battery, Chamberlain openers may beep as a warning. If the door barely moves or the opener just clicks, your battery might be too weak to lift the door. Also check the battery status LED on the opener (if your model has one). A green light usually means good, while a red or amber light means the battery is low or failing.
- Plug the opener back in: Don’t leave it unplugged longer than needed. Once plugged in, the unit will recharge the battery (and stop beeping after a while). If you observed signs of a weak battery, plan to replace it.
Steps to Replace the Battery:
- Get the correct replacement: Purchase a Chamberlain-compatible 12V battery (model 4228 or as specified in your manual). Using the wrong type can damage the opener, so ensure the voltage and size match.
- Unplug the opener and open the compartment: For safety, unplug the power cord so you don’t get a surprise door activation. The battery compartment is usually on the back or side of the opener. Open the compartment cover – often it’s held by a screw or clip.
- Disconnect old battery: You’ll see the battery with two wires (red positive + and black negative -) attached, typically with slide-on connectors. Disconnect the wires by pulling the connectors off the battery terminals (do not short them together). You might need to gently wiggle them; avoid pulling on the wires themselves too hard. If there’s a restraining bracket, remove that screw or bracket as well.
- Remove the old battery: It should slide out. Be careful, it might be a snug fit. Set it aside (and recycle it properly – these are sealed lead-acid batteries, which should be taken to a battery recycling or hazardous waste facility, or a retailer that accepts them).
- Insert the new battery: Put the new battery in the compartment in the same orientation as the old one. Reconnect the wires: red wire to the red (+) terminal, black wire to the black (-) terminal. The connectors should fit snugly; ensure they’re fully seated.
- Close up and power on: Reattach any bracket and close the compartment cover, securing it with its screw. Plug the opener back in. The opener’s battery indicator may blink or beep for a while – that’s normal while the new battery charges up. Give it a few hours to fully charge.
Testing the New Battery: After installing, you can unplug the opener again to double-check it runs on the new battery. The opener’s indicator light should typically show solid green once the battery is charged (check your manual for specifics).
Extra Tip: To maximize battery life, avoid extreme temperatures in the garage if possible (extreme cold or heat can shorten battery life). Also, if you know a big storm season is coming, test the battery or preemptively replace it if it’s close to 2 years old. Keeping a spare battery on hand isn’t a bad idea either.
By keeping your backup battery in shape, you ensure that a power outage won’t leave you stuck outside or struggling with a heavy door. It’s a simple component, but when you need it, you’ll be glad it’s working!
4. Checking and Tightening Hardware
Over time, the vibrations and movements of a garage door opener can loosen various nuts, bolts, and screws. A quick check and tighten of the hardware keeps everything safely secured and rattle-free.
Why: The garage door system has many brackets and fasteners – tracks bolted to the ceiling and walls, hinges on each door panel, the opener hanging from the ceiling, the chain or belt attachment points, etc. If any of these work loose, you might hear excess noise (rattling or banging) and parts can wear out faster or even come apart. Tightening hardware maintains the door’s structural integrity and smooth operation.
How Often: It’s good to inspect and tighten hardware at least once a year. Many experts suggest a quick monthly glance, especially on a frequently used door. At minimum, do this whenever you perform other maintenance like lubrication. If you start hearing new noises or the opener seems to wobble, don’t wait – check the hardware right away.
What You’ll Need: A set of wrenches or socket drivers (common sizes are 7/16″, 1/2″, or metric equivalents for door bolts), and a screwdriver for any screws. Chamberlain openers often use adjustable hanging brackets – those bolts might need a wrench. Also, have a ladder to reach high components and a work light to see clearly.
Hardware to Check and Tighten:
- Door Hinges & Roller Brackets: Inspect all the hinges that connect the door panels and the brackets holding the rollers on the sides. Tighten any loose screws or bolts on these hinges/brackets, but do not over-tighten (you don’t want to strip the holes in a wooden door or crush the hinge). Snug is good. Pay attention if any hinges are cracked or screws constantly come loose – that could indicate wear.
- Track Brackets: Look at the metal brackets that attach the vertical and horizontal tracks to the walls and ceiling. These usually have lag bolts into the framing. If any are loose, tighten them up. The track should be solidly anchored, which prevents the door from going out of alignment.
- Opener Mounting Bolts: Your Chamberlain opener is likely attached to the ceiling via metal hanging straps or angle iron. Make sure the bolts that connect the opener to its hanging straps are secure. Also check the bolts on the header bracket (the bracket above the garage door that connects to the opener’s rail) – a loose header bracket can be dangerous, so tighten those firmly.
- Chain/Belt Sprocket and Rail Hardware: For chain-drive models, examine the bolt that holds the sprocket or pulley at the top of the opener – it shouldn’t be loose. For belt drives, check the tensioner pulley bolt. Also ensure the rail is securely attached to the opener and the door bracket.
While tightening, if you notice any missing bolts or screws, replace them with the same size and type. Vibration is normal when the door operates, so this is just routine “mechanical shakedown” maintenance.
Adjusting Chain or Belt Tension: As part of hardware upkeep, it’s wise to check the drive chain or belt tension:
- Chain Drive: A sagging chain can slap against the rail or opener, making noise and reducing efficiency. With the door closed, look at the chain midway along the rail. It should sag slightly, but not too much. A good rule is about 1/4″ to 1/2″ of sag at the midpoint of the rail. If the chain droops more than that, you should tighten it. How to tighten the chain: Locate the chain’s adjustment bolt, typically on the trolley or turnbuckle in the middle of the chain. There will be two nuts – one for locking and one for adjusting. First, loosen the locking nut, then turn the adjustment nut to tighten the chain. Go a little at a time and check the sag. Aim for that 1/4″ sag – do not over-tighten to a guitar-string tightness, as that can strain the opener’s internal gears or cause the chain to snap. Once adjusted, re-tighten the lock nut. After adjusting, reconnect the door (if you had disconnected it) and run the opener to ensure smooth operation (no binding or loud noise). You’ll immediately hear the difference if a previously loose chain was banging around.
- Belt Drive: Belts don’t usually require much adjustment (they don’t expand and contract as chains do), but if you notice the belt is slipping or flapping, consult your Chamberlain manual for the belt tension procedure. It typically involves a similar threaded rod and nut mechanism. Do not over-tighten the belt either – too tight can cause wear. Belts generally should be taut but still a little springy when pressed.
By keeping the hardware tight and the drive mechanism properly tensioned, you’ll prevent many common issues (like wobbly movement or uneven travel). Plus, a solidly mounted system runs quieter. Remember, vibration can loosen things over time, so periodic checks are an important part of opener care. It only takes a few minutes with a wrench to potentially save you from a bigger repair down the road!
5. Cleaning and Aligning the Safety Sensors for Chamberlain
The small photo-eye sensors near the bottom of your garage door tracks are crucial for safety – keep them clean and properly aligned so they can do their job of protecting your loved ones and car.
All Chamberlain garage door openers made in recent decades have a safety reversal system with photo-electric sensors. These are the two little devices (usually one has a green LED, the other a yellow LED) located on either side of the door, about 4-6 inches off the ground. They shoot an invisible beam across. If something (a child, pet, or object) breaks that beam while the door is closing, the opener will stop and reverse, preventing injury or damage. Maintaining these sensors is essential for safety.
Why: If the sensor lenses get dirty or misaligned, the opener may think something is in the door’s path and refuse to close, or worse, if they malfunction, the door might not reverse when it should. Often, door closing issues (blinking lights and door going back up) are due to dirty or bumped sensors. Regular cleaning and alignment checks ensure the safety system works reliably.
How Often: Give the sensors a quick check every month when you’re in the garage. Honestly, this is a 1-minute task: a glance to see that both sensor lights are on (solid, not blinking) and a wipe if they look dusty. Include it in your monthly visual inspection. After bad weather (e.g. lots of dust, or snow/water that might splash on them) check them as well. At least a few times a year, do a deliberate cleaning.
What You’ll Need: A soft, dry cloth or microfiber towel. For stubborn dirt, you can dampen the cloth slightly with water. Avoid harsh chemicals on these plastic lenses. If alignment needs adjusting, you’ll use your hands (and maybe a screwdriver if the sensor bracket is screwed tight). Also, a broomstick or cardboard box will be useful to test the sensors after cleaning.
Steps to Clean and Check Sensors:
- Cut power (if you’ll be handling wiring): Generally cleaning is safe with the power on (so you can see the indicator lights). Just don’t press the remote while cleaning. If you feel safer, unplug the opener briefly.
- Wipe the sensor lenses gently: Each sensor has a glass or plastic lens (about the size of a dime). Use your soft cloth to gently wipe the lens on each one. Remove spider webs, dust, or cobwebs around them too. These sensors live near the floor, so they often collect debris or even get covered by leaves. If there’s oil or residue (sometimes garage floors have chemicals), a slightly damp cloth can help – just dry it off after. Clean sensors will ensure the infrared beam is not blocked by grime.
- Verify alignment: Check the LEDs on each sensor. Both should be lit up (usually one steady green, the other steady amber – specifics can vary by model). If one or both lights are off or blinking, the sensors are not aligned properly. To fix alignment, loosen the sensor’s wing nut (if present) and adjust the sensor’s position slightly until the receiving sensor’s light turns solid. They should point directly at each other across the doorway, with no obstruction. It sometimes helps to use a measuring tape to ensure both sensor units are the same height off the ground. Tighten the wing nut once the alignment is correct. The indicator lights will tell you – solid = good alignment, flickering or off = still not seeing each other.
- Secure the sensors: Make sure the sensor brackets are firmly attached to the track and that a football or broom can’t easily knock them out of whack. A common issue is someone accidentally kicking or moving a sensor – if your sensors seem to get misaligned frequently, consider using zip-ties or brackets to hold them more solidly in place.
- Test the sensor safety feature: Finally, test the system. Open the garage door, then close it using the opener and as it’s coming down, wave a broomstick or move an object through the beam between the sensors. The door should immediately stop and reverse, and the opener light will likely flash. Alternatively, you can hit the close button and stick your foot in the beam (about 6 inches above ground) – just don’t actually let the door hit your foot. It should reverse as soon as the beam is broken. If the door doesn’t reverse when the beam is broken, stop the door (use the remote or wall button to make it go back up) – this indicates a serious sensor malfunction. Re-check alignment and cleanliness, and if it still won’t behave, call a professional to troubleshoot or replace the sensors.
Note: Never bypass or ignore the sensors. They are a lifesaving feature. If your opener ever closes without reversing when the beam is obstructed, do not use it until fixed. On the flip side, if the door won’t close at all and the opener light is blinking, 90% of the time it’s the sensors – they’re likely misaligned or dirty. A quick clean and adjust as described will solve those “door goes back up for no reason” mysteries.
Keeping the sensors clean and aligned not only ensures your family’s safety, it also saves wear on the opener (since you won’t be forcing it to close against the safety system). It’s a small task that carries big importance in the overall maintenance of your Chamberlain garage door opener.
6. Inspecting Door Balance and Alignment
A well-balanced garage door is essential for your opener’s longevity. The opener’s job is to lift and lower the door, but it’s the door’s springs that actually do the heavy lifting. If the springs are out of adjustment (door unbalanced), the opener strains much harder – like you trying to lift weights that are off-center. Checking the door’s balance is a crucial maintenance step that directly impacts your opener’s health.
Why: An unbalanced door (one that’s too heavy on one side or overall, due to spring tension issues) will cause extra stress on the opener. Signs of poor balance include the opener struggling, the door slamming shut or drifting open on its own when disconnected from the opener, or uneven movement. By checking balance, you can catch a spring problem early. Similarly, checking alignment (ensuring the door runs straight in its tracks without binding) prevents unnecessary wear.
How Often: Chamberlain (and many garage door experts) recommend doing a balance test once a month. In reality, if your door’s springs are in good shape, they won’t go out of balance that frequently – but it’s still wise to test periodically, maybe every few months, and certainly if you notice any new strain on the opener or unusual door movement. It takes only a minute or two to test. Always do it after you lubricate and tighten hardware, since those can affect the door’s movement.
What You’ll Need: Just yourself (and perhaps a friend to observe). No special tools, though a sturdy ladder can help if you need to reach the release cord or to safely handle the door. Gloves are good to have when handling the door manually (to avoid pinched fingers on door panels).
Steps to Check Garage Door Balance:
- Disconnect the opener: Start with the door closed. Pull the red emergency release cord – tug it straight down to disengage the opener trolley (you might need to pull down and slightly back toward the motor unit). This frees the door from the opener so you can move it by hand. Ensure no one will activate the opener while it’s disconnected.
- Manually lift the door half-way: From the closed position, lift the door by hand. It should feel relatively light (the springs counterbalance the weight). Stop when the door is about halfway open (around waist to chest height). Carefully let go of the door (stay nearby in case it moves dramatically). A balanced door will hold itself in place about halfway up. Some slight drift is okay, but it shouldn’t slam down or shoot up.
- Observe the result:
- If the door stays in the middle, or moves just a few inches and stops, your balance is good. The springs are supporting the door’s weight properly.
- If the door starts to fall rapidly once you let go, the springs are not providing enough tension – the door is too heavy for the current spring tension (out of balance in the “downward” direction).
- If the door jumps up after you let go (rising towards open on its own), the springs have too much tension (overbalanced in the upward direction).
In either of the bad cases above, do not try to adjust springs yourself. Springs can be very dangerous – call a professional garage door technician to rebalance or replace them. Operating the door with unbalanced springs also strains your opener, so you’ll want to address it promptly.
- Check for smooth travel: While the door is disconnected, also slide it up and down manually a few times. It should move smoothly, without binding or scraping. If you feel it sticking at certain spots or one side seems to jam, there might be an alignment issue (tracks could be bent or not parallel, or rollers worn). Lubrication often helps, but if it still binds, you may need a professional to adjust the tracks. A well-aligned door should move easily and evenly.
- Reconnect the opener: Once done, connect the opener carriage again. On Chamberlain openers, you can usually just run the opener with the remote and it will snap the trolley back onto the carriage. Or manually slide the door fully closed and pull the red release cord toward the door to re-engage it. You might hear a “click” as it reconnects. Never leave the door disconnected from the opener when it’s open – it could crash down – always reconnect when finished with balance testing.
Additional Alignment Checks: Stand inside the garage and look at the door when it’s closed. Do the gaps between the door and frame look even on both sides? Are the tracks plumb (vertical) and securely anchored? If you notice one side of the door is lower than the other at the floor, or the door seems to shift sideways, that could indicate a cable issue or track issue – have a professional inspect those. Also check the weatherstripping along the bottom – if one corner is crushed and the other isn’t touching the ground, the door may be slightly crooked in its travel.
By checking the balance monthly, you ensure that the heavy lifting is being done by the springs, not by your garage door opener. This is absolutely crucial for opener longevity – remember, the opener is not designed to lift a “dead weight” door, it’s meant to assist the spring system. A balanced door can prevent opener burnout and gear damage. It also ensures the safety reverse works properly; an unbalanced door might not reverse correctly because the weight distribution confuses the force sensor.
In short, a quick balance test keeps you informed about the health of your door’s springs and overall alignment. It’s a preventative check that can save you from major headaches and keep your Chamberlain opener running smoothly.
7. Updating the Opener’s Firmware (If Applicable)
In today’s connected world, even garage door openers can have firmware updates! If your Chamberlain opener is a smart model (for example, it has built-in Wi-Fi and uses the MyQ app), it may receive occasional firmware/software updates from the manufacturer. These updates can improve functionality, security (like patching Wi-Fi issues), or add features.
Why: Firmware updates ensure your opener’s controller is running the latest code – potentially fixing bugs (like erratic sensor warnings or connectivity problems) and maintaining compatibility with smart home systems. Chamberlain sometimes releases updates to enhance MyQ connectivity or to address issues reported by users. While not all openers have user-updateable firmware, it’s worth checking if yours does, to keep everything up-to-date and secure.
How Often: There’s no set schedule for firmware updates – they come out as needed. Check once in a while (every few months) via the Chamberlain MyQ app or the Chamberlain website to see if any updates are available for your model. The MyQ app may proactively alert you if an update is available for devices connected to it. If your opener is working fine, you generally don’t need to seek out updates unless instructed by Chamberlain.
What You’ll Need: If an update is available, you typically just need your smartphone with the MyQ app (or access to the device’s interface). Ensure your opener is connected to your home Wi-Fi (if it’s a Wi-Fi model) and that your phone has a good internet connection. Some older smart openers might update via a USB connection or during a service visit, but the common method now is over-the-air updates via the app/cloud.
Steps to Update Firmware:
- Check the MyQ App or Manufacturer’s Instructions: Open the MyQ app on your phone. Navigate to your garage door opener device settings. Look for a section like “Device Info” or “Firmware Version.” If there’s an “Update” button or a note that an update is available, follow the prompts in the app. The app will usually download the update and send it to the opener automatically.
- Ensure a stable connection: During an update, keep your phone near the opener (to maintain Bluetooth/Wi-Fi connection if required) and make sure your home Wi-Fi isn’t turned off. It might take several minutes. Do not operate the door during this time.
- Follow any on-screen instructions: The app might instruct you to press a specific button on the opener or confirm some steps. Do so as directed. Many times, it’s hands-off and will simply progress through the update and then tell you when it’s done.
- Verify the update: Once completed, the app should indicate the device is up-to-date. Test that your opener still responds to commands normally. Usually, firmware updates won’t change your opener’s basic operation, but checking doesn’t hurt.
If your opener isn’t app-enabled but still is a newer model, it might not have any user-updateable firmware. In that case, you don’t need to worry about this step. (If Chamberlain ever issued a critical update, it would be in the news or they’d notify registered owners.)
Note: If you encounter issues during an update (e.g., it fails or the opener becomes unresponsive), contact Chamberlain support for guidance. It’s rare, but like any tech, things can glitch. Generally, though, these updates are smooth.
Keeping the firmware updated is a bit like updating your phone or computer – not something our parents had to think about with garage openers, but it can be worthwhile for the tech-savvy homeowner. It ensures your Chamberlain smart opener continues to work with the latest apps and smart home systems and that any known issues are resolved.
(If your opener is not a smart model with firmware updates, you can happily skip this section – your maintenance will be purely mechanical. But it’s good to know for those with newer models!)
Conclusion: Keeping Your Garage Door Opener in Top Shape
Congratulations – by following this comprehensive maintenance routine, you’re investing in the long-term performance of your Chamberlain garage door opener. 🎉 Let’s quickly recap the key tasks we covered:
- Regular lubrication of chains, belts (if needed), rollers, and hinges to reduce friction and wear.
- Fine-tuning force and limit settings so the door travels correctly and auto-reverses safely when it should.
- Testing and replacing the backup battery to ensure your opener works even during power outages.
- Tightening hardware and checking the drive tension to keep everything solid and aligned.
- Cleaning and aligning safety sensors for reliable obstacle detection and peace of mind.
- Inspecting door balance and alignment to prevent opener strain – the door should be doing the heavy lifting, not the opener!.
- Updating firmware (when applicable) so your smart opener runs the latest and greatest software.
Performing these DIY maintenance steps on a regular schedule will ensure smooth and quiet operation, catch little issues before they become big problems, and extend the lifespan of both your opener and your garage door. Your opener will thank you with years of reliable service.
Before we sign off, remember a couple of final tips:
- Stay Safe: Always prioritize safety – if a repair is beyond your comfort level, there’s no shame in calling a professional. Garage doors can be dangerous if mishandled. You’ve done well by handling the basics; leave the heavy fixes (like spring replacements or major repairs) to the pros.
- Listen and Watch: Make it a habit to observe your garage door in action regularly. Often, you can hear or see early warning signs – a new noise, a slight jerk, a slower movement – and address them with the steps from this guide. A well-maintained door should be relatively quiet and smooth.
- Annual Professional Check: Even with great DIY maintenance, consider having a professional tune-up every year or two. They can check things beyond the scope of DIY (like spring tension, motor wear, etc.) and ensure all safety features are calibrated. Think of it like occasionally servicing your car even if you do your own oil changes.
By being proactive with maintenance, you’re not only preventing inconvenient breakdowns and expensive repairs, but also ensuring the safety of everyone who uses the garage. Enjoy the confidence of a garage door opener that’s in tip-top shape – one that opens on command, closes safely, and stands the test of time. Happy DIY maintenance, and here’s to many more years of dependable performance from your Chamberlain garage door opener! 🚗🏡🔧