Homeowners often rely on the built-in light of their LiftMaster garage door opener for convenience and safety. Under normal operation, this courtesy light turns on when you activate the door and then shuts itself off after roughly four and a half minutes. This timer is controlled by the opener’s logic board, and in many models the shut-off interval can be adjusted using the wall-mounted control panel. If you discover that your LiftMaster opener’s light won’t turn off after 4½ minutes, it indicates something is overriding or resetting that timer. Not only can a continuously burning light be annoying, but it also wastes electricity and may hint at an underlying issue.
In this article, we will explore why this problem happens specifically in LiftMaster openers, and provide a detailed troubleshooting guide. We will cover common causes – such as an accidentally enabled Light button, an active motion-sensor mode, or even wiring faults – and explain how to fix each one. We’ll also advise when it’s time to call a professional and how to prevent the issue from recurring. The goal is to help you, as a homeowner, resolve the issue of a stubborn garage light in a safe and methodical way.
Why the LiftMaster Opener Light Has a 4½ Minute Timer
LiftMaster (and its sister brands like Chamberlain) designs most of its garage door openers with an automatic light timer. When you operate the door (either opening or closing), the opener’s light will come on to illuminate your garage. This light is meant to stay on for a preset interval (about 4 to 4½ minutes) and then turn off on its own. The timing is set at the factory for convenience – it’s long enough for you to park and get into the house, but short enough not to be left on too long.
In many LiftMaster models that use a multi-function wall control panel, this interval can be customized or changed using the menu or a specific sequence of button presses. Under normal circumstances, you shouldn’t have to think about it – the light will automatically switch off after the delay. Therefore, if the garage opener light stays on well beyond four or five minutes, it signals that something isn’t working as intended. There are a few typical reasons for this malfunction, which we will discuss in detail below.
Accidental Manual Activation of the Light
One of the simplest reasons a LiftMaster opener light might stay on indefinitely is that it has been manually switched on by accident. Most LiftMaster garage door openers come with a wall-mounted control panel (often called a multi-function door control) that includes a button specifically for the light. If you press the “Light” button on the wall control, it toggles the opener’s lights on or off independent of door movement.
Homeowners or family members may inadvertently press this button, or it might be engaged while cleaning or organizing the garage. When the light is turned on this way, it will override the timer and remain lit until it’s turned off manually or until the next door operation resets the cycle. It’s surprisingly easy to activate this switch without realizing it – for example, leaning something against the wall control or pressing the wrong button in the dark could engage the light.
Troubleshooting and Fix – Light Switch: To resolve this, check the wall control panel inside your garage. Locate the button labeled “Light” (sometimes indicated by a lightbulb icon). If the opener light has been staying on, press this button once and observe if the garage light turns off. In many cases, this simple step will fix the problem immediately. Some LiftMaster panels have an LED indicator that glows when the light is locked on; if yours has this, ensure that indicator is now off. After pressing the Light button, allow the opener to sit idle and see if the light now adheres to the normal auto-off timer.
Remember that if you manually turn the light on, it will typically stay on until after the next garage door activation plus the timer interval. For instance, if you had accidentally left the light on and then you open or close the garage door, the opener’s logic should turn the light off 4½ minutes after that operation unless it’s toggled off sooner. If pressing the button has no effect (the light remains on or won’t turn off at all), then the issue may lie elsewhere, such as a wiring fault or control panel malfunction, which we will address later.
To prevent this issue in the future, be mindful when using the wall control. Make sure everyone in the household knows what the Light button does. If you find this feature gets activated too often by accident, you might place a small label as a reminder, or consider upgrading to a panel with a screen that clearly shows when the light is manually turned on. Generally, however, simply being aware of the Light switch and checking it first whenever the opener light behaves oddly is enough to avoid prolonged accidental activation.
Motion Sensor Mode Is Keeping the Light On
Many newer LiftMaster garage door openers come equipped with a motion sensor feature. This is a convenience and safety function: a built-in motion detector (often part of the wall control panel unit) will automatically turn on the garage door opener’s light whenever it senses movement in the garage. For example, if you walk into your garage from the house, the sensor picks up your movement and switches on the light so you’re not left in the dark. In LiftMaster systems, the default setting is typically to have this feature enabled (with the light staying on for the standard interval, usually 4½ minutes, each time motion is detected).
The problem arises if this motion sensor mode is constantly triggering the light. Frequent activity in the garage – such as people coming and going or even large pets moving around – can continually reset the light timer, making it appear that the light “never turns off.” Essentially, just as the 4½ minute countdown is about to lapse, new motion is sensed and the timer restarts from zero, resulting in a light that stays on as long as there is periodic movement.
Sometimes, environmental factors or sensor sensitivity can cause false triggers. For instance, the motion sensor might be overly sensitive to heat or slight movements. Vibrations from heavy machinery or even the door opener’s own operation might be interpreted as movement. In rare cases, a faulty motion sensor can behave as if it’s detecting movement constantly even when the garage is empty. All these scenarios will lead to the light remaining on far beyond 4½ minutes because the opener “thinks” someone is still present.
Troubleshooting and Fix – Motion Sensor: First, determine if your LiftMaster opener actually has a motion-sensing control panel. Models with a motion sensor typically have a small lens on the wall console (for example, LiftMaster’s Smart Control Panels or multi-function panels often include this). If you do have one, observe the garage environment. Try standing perfectly still out of the sensor’s view after opening/closing the door, and wait to see if the light eventually goes out. If it does turn off only when there is no movement, that’s a strong indicator that the motion sensor feature is what’s keeping it on.
The easiest fix in this case is to turn off or disable the motion sensor lighting feature temporarily to confirm. On many LiftMaster units, you can toggle this setting via the menu on the wall control or via a specific button sequence. For example, using the menu: go to Light Settings and find the Automatic Light (or “motion sensor”) option, then switch that feature off. Some models allow doing this by pressing and holding the Light button for about 10 seconds, but instructions vary by model – checking your specific opener’s manual is wise. Once the motion sensor auto-light is deactivated, test the system: walk out of the garage and close the door, then see if the light now turns off after the set interval. If it does, you’ve confirmed that the motion detection was the culprit.
In many cases, homeowners don’t actually want to turn this useful feature off permanently – it’s there for safety and convenience. If you prefer to keep using it, but found that it was overly sensitive, you might try repositioning the sensor (if possible) or reducing sources of constant motion. Ensure that no vents, heaters, or moving objects (like hanging banners or curtains) are in the sensor’s direct range, as they can trigger it with drafts or heat. If the sensor appears to be malfunctioning (e.g. it triggers lights with no movement at all), you might need to replace the motion-sensing wall control unit.
In the meantime, leaving the feature off will at least keep the light from staying on. Always refer to your LiftMaster opener’s user manual for the correct steps to toggle motion sensor modes, as these can differ between models. By managing this feature carefully, you can prevent the garage light from needlessly staying on while still enjoying the safety benefits when you truly need them.
Safety Sensors or “Automatic Light” Feature Triggered
Apart from a motion detector in the control panel, LiftMaster openers can also turn on the light in response to the safety reversing sensors (the infrared photo-eyes at the base of your garage door frame). Many LiftMaster models (especially older ones) have an automatic lighting feature tied to these sensors: if the door is open and something crosses the beam between the sensors, the opener light will come on and stay on for the set period (4½ minutes by default). This is intended as a courtesy feature – for instance, if you walk into an open garage from outside and break the beam, the light turns on to welcome you.
However, it can also cause the light to stay on longer than expected if something repeatedly interrupts the sensor beam. For example, if you have the garage door open for an extended period (perhaps while working in the yard) and people keep walking through the doorway, each time the beam is broken the light timer resets. The result can appear as if the light never turns off, when in reality it’s just continuously restarting its 4½-minute cycle due to activity.
Another scenario is if the safety sensors are misaligned or blocked by an object. Misalignment means the sensors can’t “see” each other properly, which the opener might interpret as an object constantly in the doorway. In normal operation, a misaligned or blocked sensor will prevent the garage door from closing and usually causes the opener lights to blink or stay on as a warning. In some cases, the light might stay on steadily because the sensor beam is continuously broken. This is less common than the motion sensor issue, but it’s worth checking the sensor alignment if your opener light refuses to shut off. A telltale sign of sensor trouble is if your garage door won’t close using the opener (or reverses immediately) while the light also stays on; that combination strongly points to a sensor obstruction or alignment problem.
Troubleshooting and Fix – Safety Sensors: Inspect the photo-eye sensors located near the bottom of your garage door tracks. Ensure they are facing each other properly and that nothing is hanging or placed in the doorway that could interrupt the beam. Each sensor usually has a small LED light – one will be green and the other amber in many LiftMaster units. If they are properly aligned and unobstructed, those LEDs should be solid (not blinking). If you notice a sensor light blinking or off, adjust the sensor until the LED glows steady, and remove any debris or spiderwebs that might be blocking it.
After correcting any sensor issues, test the opener again: close the garage door, then once it’s fully closed (so that breaking the beam is the only trigger), walk through the sensor beam once to simulate entry and then stay clear. Observe whether the light turns off after the expected interval. If the light now behaves normally, you’ve likely fixed the issue. In cases where you need the garage door to stay open but want the light off (for example, during a long project), note that as long as the sensor beam isn’t interrupted the light should eventually time out. You could temporarily tape one sensor to prevent constant retriggering – but do not forget to remove any such obstruction and ensure proper sensor alignment before closing the door again, since the sensors are critical safety devices.
If you suspect that the automatic sensor-triggered lighting feature is causing unwanted behavior (and your model is from before 2020 – newer LiftMaster models have reportedly removed this feature on some units), you might check your manual to see if that feature can be turned off. Some premium openers allow disabling the light-from-sensors function via a control panel setting. However, for most homeowners, simply being aware of this function is enough: if you know the beam was crossed, then the light staying on a few extra minutes is normal. By keeping the sensor path clear when you want darkness, or by closing the garage door when possible, you can prevent the courtesy light from staying on too long due to this feature.
Wiring Issues and Wall Control Problems
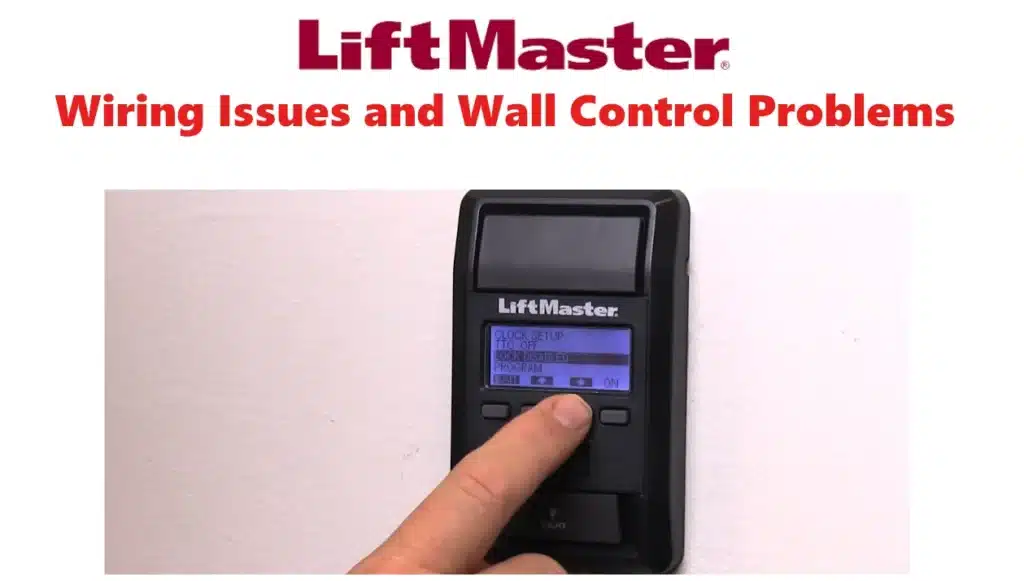
If you have ruled out the simpler causes above (the light button isn’t stuck on, motion sensing is off or not at fault, and nothing is triggering the safety sensors), the next possibility is an electrical or wiring issue. The garage door opener’s light circuit can be inadvertently held “on” by a short circuit or a malfunction in the wiring of the control systems. There are a couple of key areas to consider: the wall-mounted door control wiring and the control panel itself.
Wall Control Wiring: The wall button or panel is connected to the opener unit by a pair of low-voltage wires. If these two wires touch or short together (for instance, due to damaged insulation or a staple cutting through the wire), it’s equivalent to pressing the light button continuously. A partial short or stray current can send a constant signal to the opener’s logic board that keeps the light on. Similarly, if you have a wired remote switch or any add-on wired controls, check those as well. Signs of wiring issues could include the wall control behaving erratically or the light staying on even after replacing the wall control unit.
Wall Control Panel Malfunction: Even without obvious wiring damage, the multi-function panel itself can fail internally – for example, a stuck circuit or a failed electronic component in the panel might continuously send the “light on” command. LiftMaster’s multi-function panels are generally reliable, but exposure to moisture or impact could cause a fault. If your wall control has other functions (like a lock button, motion sensor, etc.), check if those work properly. A malfunctioning control panel might also fail to operate the door or show no LED display, but in some cases the light button circuit alone can fail closed.
Troubleshooting and Fix – Wiring and Control Panel: A systematic way to diagnose this is to disconnect the wall control from the opener unit and test the light. Before doing anything, cut power to the garage door opener for safety (unplug the opener or switch off its breaker). Then, locate the terminals on the opener motor unit where the wall control wires are connected. Typically, two screws or push-in terminals hold these small gauge wires. Disconnect both wires (note which goes where so you can reconnect later). Once the wall control is completely detached from the opener, restore power to the opener.
The light may come on immediately (since many openers will turn the light on when powered up) – if so, wait to see if it turns off after the standard timeout. With the wall control removed, the opener should not receive any “light on” command. If the light now turns off on schedule (after 4½ minutes or whatever the timer is set to), it strongly indicates that the issue was in the wall control circuit (either the wires or the panel) On the other hand, if the light still stays on continuously even with the wall control wires disconnected, then the problem is not coming from the wall button – it could point to an internal fault in the opener’s logic board (discussed in the next section).
If the wiring/control is suspected, the next step is to figure out whether it’s the wires or the wall unit. One approach is to reconnect a temporary short wire directly from the opener to the wall control (bypassing the in-wall wiring). Take a fresh piece of insulated wire, attach it to the opener’s wall control terminals, and connect the other end directly to the wall control panel’s terminals (you may need to unscrew the wall control from the wall to do this easily). This effectively uses a new wire in place of your existing installed wiring.
Again, let the opener power on and cycle the light. If with this new short wire the light goes off properly after the interval, then your wall-mounted wiring (the long wires running along the ceiling/wall) are likely damaged and should be replaced. If the light still refuses to go off even with the wall control hooked up by a new wire, then the wall control panel itself is likely defective. Replacing the control panel should solve the issue in that case. Wall control panels for LiftMaster are usually model-specific, so ensure you get the correct replacement (or consider upgrading to a newer compatible panel if available). When re-running any wires, use proper insulated staples and avoid pinching the wire to prevent future shorts. By carefully inspecting and testing the wiring and control, you can eliminate these as causes for the persistent light.
Faulty Logic Board or Stuck Light Relay
If you’ve tried all of the above fixes and the opener light still won’t turn off after the set time, the root cause may be a hardware failure inside the opener’s logic board. The logic board is the “brain” of the garage door opener – it receives signals from the remotes and wall control and switches the motor and lights on or off. On that circuit board, a small electronic component (often a relay or transistor) controls the power to the light bulb. Over time, components can fail. For example, the relay that clicks the light on and off might get stuck in the closed position (perhaps due to a surge or wear), effectively supplying continuous power to the light socket.
If that relay is stuck, no amount of button-pressing or sensor resetting will turn the light off, because the circuit board itself is “jammed” on. Other logic board issues like burnt-out circuitry or a short on the board can also result in the light being on all the time. In LiftMaster openers, a consistently on light accompanied by other odd behaviors (like the opener not responding to commands or blinking diagnostic LEDs) is a strong indication of a board issue. However, if only the light is malfunctioning and everything else works (the door opens/closes with wall control and remotes just fine), the light control section of the board could be the sole problem.
Troubleshooting and Fix – Logic Board: Unfortunately, once you’ve isolated the problem to the logic board, the solutions become a bit more limited for a DIY homeowner. One step you can try is to reset the opener’s electronics by doing a power reset. This means unplugging the garage door opener (or turning off the breaker) and leaving it without power for about 30 seconds to a minute. This can allow capacitors to discharge and the system to reboot, potentially clearing any transient glitch in the controller. After restoring power, test the opener normally: activate it to turn on the light, then see if it goes off after the set time. In the best case, you might find the issue was a temporary glitch that the reset resolved. However, if the light still stays on continuously even after a hard reset, it implies a persistent fault.
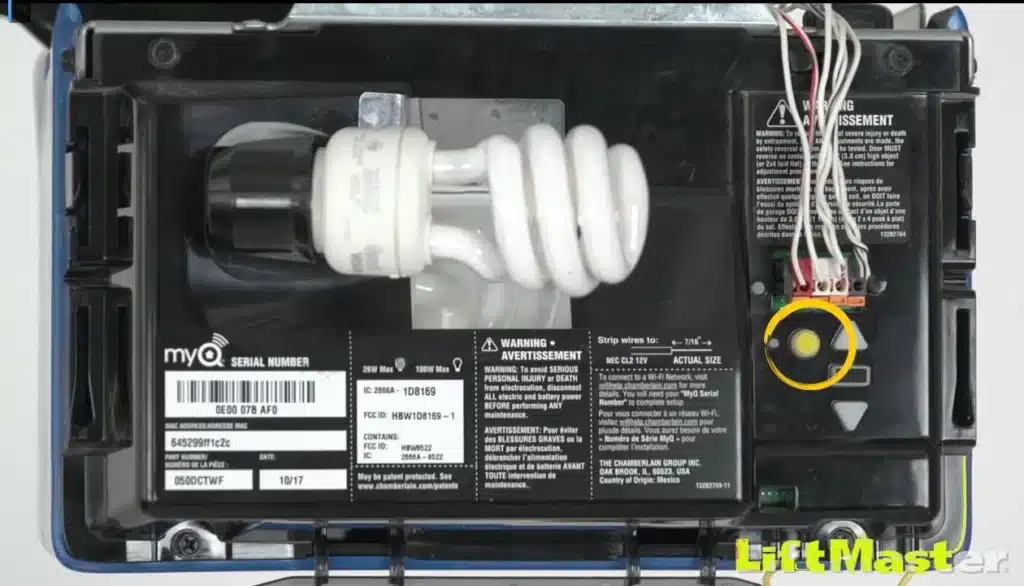
Some LiftMaster models have an adjustable light timer (accessible via the control panel or a combination of buttons). You could try setting this to a shorter duration (say 1½ minutes) as a test – if even the shortest setting doesn’t turn the light off, that again points to a board issue. Additionally, double-check the light bulb itself: rarely, a non-standard bulb or a shorted light socket could cause electrical feedback. Make sure you are using an appropriate bulb (LiftMaster typically recommends a standard incandescent or an opener-rated LED bulb of correct wattage). Inspect the light socket for corrosion or damage as well – a damaged socket could theoretically create a short circuit. Replacing the bulb with a known good one is a quick test (and ensure the bulb is firmly seated – though a loose bulb usually causes the light to fail off, not stay on).
If none of these checks and resets make any difference, it confirms that the internal circuitry is at fault. The most straightforward fix is to replace the logic board of the opener. This is a repair that some technically inclined homeowners can do (the board can be ordered for your specific model and swapped out, typically with just a few wiring connections and screws), but it can be a bit complex. Since the logic board is a costly part, you’ll want to be sure of the diagnosis before replacing it. At this juncture, many homeowners opt to call a professional garage door technician for confirmation and replacement, especially if the opener is older – in some cases, investing in a new opener might be considered if the unit is near end-of-life.
When to Call for Professional Help
While many of the troubleshooting steps above are homeowner-friendly, there are times when calling a Liftmaster professional garage door technician is the best course of action. Consider professional help in the following cases:
- Persistent Issue After Troubleshooting: You have tried all the recommended steps – checking the Light button, disabling features, inspecting sensors, testing wiring, and even resetting the unit – yet the garage door opener light still won’t turn off as it should. At this point, the issue may be beyond a simple DIY fix and likely resides in the internal electronics or complex wiring problem. A technician has the tools to further diagnose issues like a faulty circuit board or wiring faults that are not obvious. As mentioned, a constantly illuminated light that defies all troubleshooting often means the logic board’s light circuit is bad, which a professional can confirm and replace.
- Blinking Lights or Other Symptoms: If your opener light is not only staying on, but maybe blinking on and off, or if you see unusual LED indicator flashes on the opener itself (or a red LED on the control panel), these can be error codes or signs of electrical faults. Blinking opener lights could indicate safety sensor issues or other errors. A solid red LED on some smart panels indicates a lock mode or wiring issue. These signs, especially appearing after you tried to reset the unit, warrant expert attention. They might diagnose a miswired connection or a short on the board that isn’t easily discoverable.
- Safety and Convenience: If you’re uncomfortable performing the wiring disconnection or logic board replacement, or you don’t have the necessary tools (like a multimeter to test circuits), calling a professional is safer. Garage door systems involve electrical components and, of course, the door mechanism itself which can be dangerous if mishandled. A certified technician can safely work on the opener at the ladder-height, test the electrical components, and ensure everything is put back correctly. They can also verify that other features (like the safety reverse system) are still functioning properly after the repair, giving you peace of mind.
- Under Warranty or Service Plan: If your LiftMaster opener is fairly new and under warranty, it’s advisable not to tamper too much on your own. Contacting LiftMaster or an authorized dealer might get you a replacement part or unit under warranty. Even outside of warranty, if you have a maintenance plan or the opener was installed by a company recently, it may be covered for service. Professional repair might actually save cost in the long run by correctly fixing the problem the first time.
In summary, don’t hesitate to call a professional if the issue persists or if at any point you feel uncertain. A garage door expert will pinpoint whether the light problem is due to faulty wiring, a failing logic board, or something more unusual, and will perform the fix safely. They can also perform a general check to ensure no other part of your garage door system was impacted by whatever caused the light to stick on (for example, confirming the safety sensors and door balance are all correct). Remember, the goal is not just to turn the light off, but to ensure your garage door opener is reliable and safe to use.
The Lights on My LiftMaster Garage Door Opener Are Staying On “Youtube”
Preventing Future Light-Staying-On Issues
Once you have resolved the immediate problem of the garage opener light staying on, it’s wise to take a few steps to prevent the issue from happening again:
- Mindful Use of Controls: As noted earlier, be aware of the wall control’s Light button. Make a habit of checking that button if you notice the light staying on. Teach family members or anyone who uses the garage about the button’s function so it doesn’t catch you off guard. This simple awareness will prevent a lot of accidental leave-on scenarios.
- Manage Motion Sensor Settings: If your opener has a motion-sensing light feature and you found it was too easily triggered, consider leaving that feature off or adjusting the sensitivity (if your model allows). Some advanced models might let you adjust sensitivity or coverage area; consult the manual. If it’s on, try not to place objects in constant motion (like hanging decorations or moving heat sources) near the sensor’s field of view. This will reduce false triggers so the light can time out properly.
- Ensure Clear Sensor Path: Keep the area around your safety reversing sensors clear. Avoid leaving tools, bicycles, or lawn equipment in a position that partially blocks the sensor beam when the door is open. Also periodically wipe the sensor eyes to remove dust or cobwebs. Properly functioning safety sensors should not cause the light to stay on except when something actually crosses the doorway, so maintenance here also contributes to the light behaving normally (and, more importantly, ensures your door’s safety system works).
- Check Wiring Periodically: It’s good practice every so often to visually inspect the wires of your garage door opener system. Look at the wall control wires running along the ceiling or wall – are they stapled securely without being pierced? Do you see any frayed or chewed sections (which could happen if rodents are present)? Also glance at the wiring connections on the opener unit for any obvious loose screws or corrosion. Catching and fixing wiring wear early can prevent strange issues like lights staying on or the door opener malfunctioning.
- Use Proper Bulbs and Surge Protection: Use only manufacturer-recommended light bulbs in your LiftMaster opener. Many openers specify not to exceed a certain wattage (often 75W or 100W if incandescent). If you use LED bulbs to save energy, choose those that are garage-door-opener compatible (some LEDs can interfere with remote signals, though they wouldn’t typically cause a light to stay on). Also, consider plugging your opener into a surge protector or having a surge protective outlet installed. Power surges or lightning strikes can damage the logic board. A surge protector can help prevent electrical spikes from causing the kind of damage that might leave your light circuit stuck on. This protects not only the light function but all electronics in the opener.
- Regular Maintenance: During your routine garage door maintenance (such as lubricating hinges and testing the auto-reverse), include a quick test of the opener light. Activate your door and ensure the light turns off after the set time. If you ever notice it not turning off properly, you can then immediately investigate the simple causes (like the light button or sensors) before it becomes a prolonged issue. Staying vigilant will help catch the issue early if it recurs.
By following these preventative measures, you can minimize the chances of encountering the frustrating “light won’t turn off” scenario again. In most cases, a LiftMaster garage door opener is a robust device that will work correctly for years, but a little attention and care will ensure it continues to do so.
Homeowner inspecting the garage door opener and its wiring. Regularly checking the opener’s wires, sensors, and settings can prevent issues like a constantly burning light.
Conclusion
A garage door opener’s light that refuses to turn off after 4½ minutes can be more than a minor annoyance – it can signal a setting that needs adjustment or a component that requires attention. In this article, we focused on LiftMaster garage door openers and examined why their lights might stay on beyond the typical timeout. We saw that in many cases the culprit is straightforward (for example, an accidentally pressed Light button on the wall control or an active motion sensor mode that’s doing its job a bit too enthusiastically). Other times, the issue can be electrical – ranging from safety sensor triggers to wiring shorts or even a faulty logic board. By following the troubleshooting steps for each potential cause, you can methodically narrow down and fix the problem. We discussed how to reset certain features, how to test the wall control and wiring, and when a deeper hardware fix might be needed. Importantly, we also highlighted when to call a professional technician, especially if the solution goes beyond a quick DIY fix.
With the light now behaving as it should, you can once again count on your LiftMaster opener to illuminate your garage only when necessary. Going forward, applying the prevention tips – from being careful with controls to maintaining sensors and wiring – will help keep your garage door opener running smoothly. Remember, the opener’s light is ultimately there for your convenience and safety. Ensuring it turns off properly not only saves energy but also gives you confidence that your garage door system is functioning correctly from top to bottom. If the problem does recur or if anything seems amiss, don’t hesitate to revisit these steps or seek professional guidance. With a little diligence, you’ll keep that garage light under control and enjoy the full convenience of your LiftMaster garage door opener for years to come.