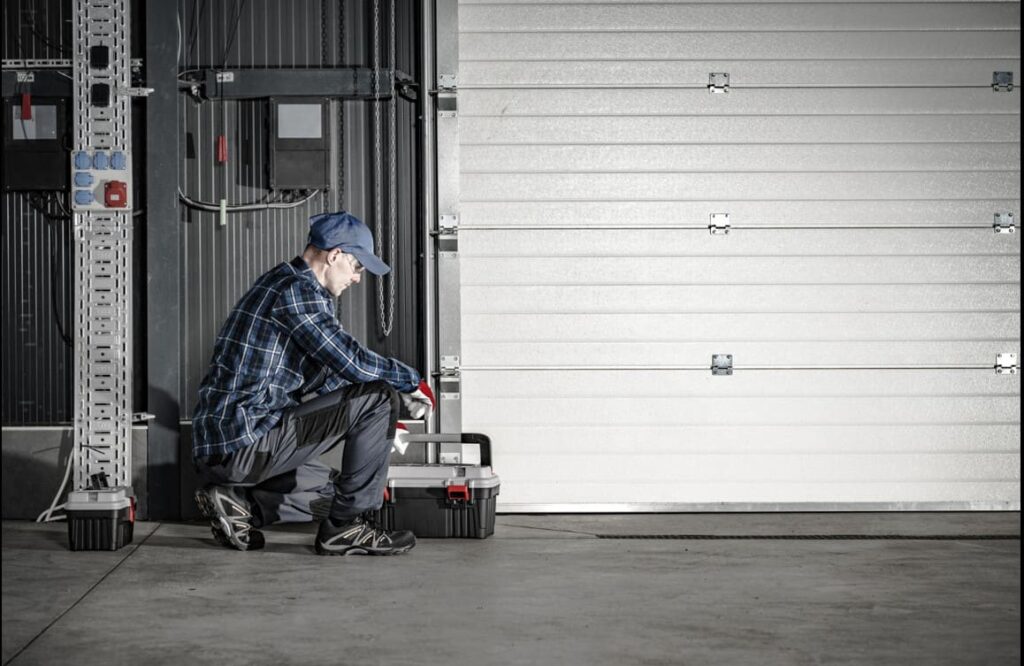
If your garage door remote stops working or you’ve recently moved into a new home, knowing how to reset a garage door remote control is essential for security and convenience. This comprehensive guide will walk you through the process of resetting and reprogramming remote controls for popular brands like LiftMaster, Chamberlain, Craftsman, and Genie. By following these step-by-step instructions, you can quickly restore control of your garage door and ensure only authorized remotes operate your door. We’ll also cover troubleshooting tips for common issues and explain what to do if your garage door remote won’t program properly.
How to Reset a Garage Door Remote Control for LiftMaster Openers ?
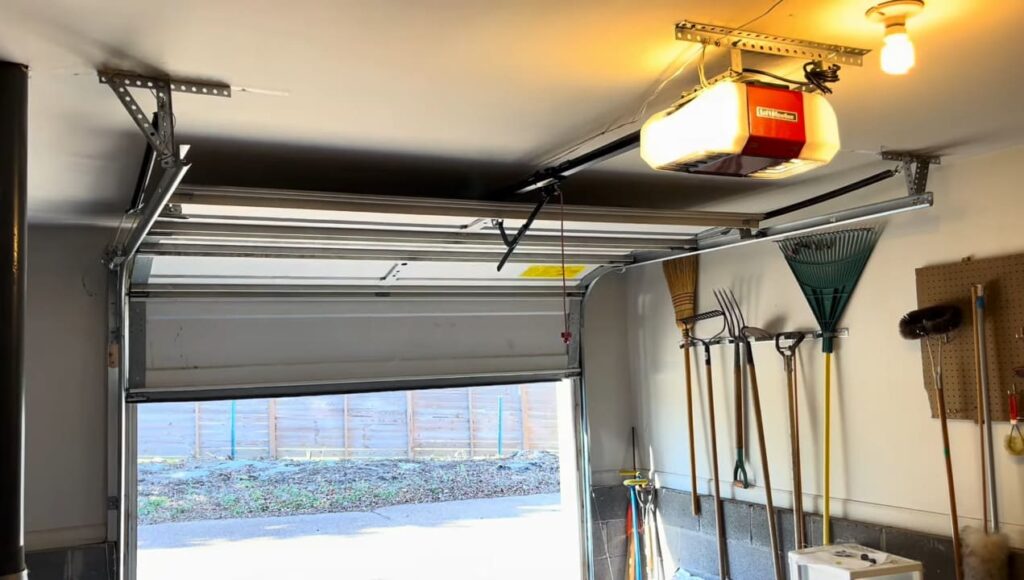
LiftMaster is a popular garage door opener brand, and resetting its remote control typically involves using the opener’s “Learn” button. The Learn button is usually located on the back or side of the ceiling-mounted opener unit (often behind the light cover) and is brightly colored (yellow, purple, red, orange, or green). Resetting the remote essentially means clearing the opener’s memory of remote codes and then reprogramming the remote. Here are the steps to reset and reprogram a LiftMaster garage door remote control:
- Locate the Learn Button: Place a sturdy ladder under the garage door opener and find the antenna wire hanging down. Remove the light bulb cover (if present) to access the control panel. Look for a colored Learn button on the opener’s panel (round yellow or square purple/red/green button). This is the button you’ll use to reset and program the remote.
- Erase Old Remote Codes (Optional Full Reset): If you want to clear all existing remotes from the opener’s memory (for example, if a remote was lost or you’re moving into a new house), press and hold the Learn button for about 6 seconds until the LED next to it turns off. This indicates that all previous remote codes have been erased. (Note: This step will remove all remotes from memory, so any remotes you still have will need to be reprogrammed.)
- Enter Programming Mode: Now, press and release the Learn button once. A small LED light near the Learn button will glow steadily (or the opener’s light might come on) to signal that the unit is in learn mode, ready to receive a new remote signal.
- Program the Remote Control: Within 30 seconds of pressing the Learn button, press and hold the main button on your LiftMaster remote that you want to use to operate the door. Hold the remote button for a second or two, then release. The opener’s light bulb will blink or you may hear two clicks, indicating the remote was successfully programmed. On many models, the opener light flashes once to confirm a new remote code is stored.
- Test the Remote: Wait a few seconds, then press the remote button again (the one you just programmed) to test the door. The garage door should open or close normally. If it does, you’ve successfully reset (reprogrammed) the LiftMaster remote.
- Program Additional Remotes (If Needed): If you have other LiftMaster remotes to add, simply repeat the press Learn, then press remote process for each one. Most LiftMaster openers can store up to 20 remote controls in memory.
- Exit Learn Mode: The opener will exit programming mode automatically (the Learn LED will turn off) after a few moments. Ensure the light cover is back in place and climb down safely.
LiftMaster Remote Reset Notes: The Learn button’s color can also indicate what kind of remote is compatible with your opener. For example, a purple Learn button uses Security+ 315 MHz remotes, while a yellow Learn button (Security+ 2.0) uses a different protocol. Make sure you are using a LiftMaster remote that is designed for your opener’s technology. If you follow the steps above and the remote still doesn’t program, double-check that the remote’s battery is fresh and that the opener’s antenna wire is hanging down freely for a good signal. We’ll cover more troubleshooting in a later section.
How to Reset a Garage Door Remote Control for Chamberlain Openers ?
Chamberlain garage door openers are made by the same company as LiftMaster, so their remote resetting procedure is very similar. You will also use a Learn (or “Smart”) button on the opener unit to erase old codes and program the remote. The Chamberlain Learn button is typically on the back or side of the opener (under the light lens) and may be purple, yellow, red/orange, or green, depending on the model (yellow on newer MyQ-enabled models, purple or other colors on older models). Follow these steps to reset and reprogram a Chamberlain garage door remote control:
- Find the Learn Button: Use a ladder to access the garage door opener housing. Locate the Learn button on the unit. It’s usually near the hanging antenna wire or under the light bulb cover, often labeled “Learn” or “Learn Code.” It might be a square button if it’s red, orange, green, or purple, or a round yellow button on newer units.
- Clear Existing Remotes (Optional): To wipe the opener’s memory of all remote controls, press and hold the Learn button for about 6 seconds until the Learn indicator LED turns off. This step erases all previously programmed remotes from the Chamberlain opener’s memory. You’d do this if a remote was lost/stolen or if you just moved in and want to ensure old remotes won’t open your garage.
- Activate Learn Mode: Press and release the Learn button once. You should see an LED next to the button light up solid (or sometimes it will blink, depending on model) to indicate the opener is in learning mode and ready to pair a remote.
- Press Remote Button: Within 30 seconds, press and hold the desired button on your remote control. (Choose one of the remote’s buttons that you want to control this door – many remotes have 2 or 3 buttons for multiple doors.) Hold it for a second, then release. The opener should confirm programming by flashing the built-in light or clicking twice. On Chamberlain openers, the courtesy light typically blinks twice to indicate a remote has been stored successfully.
- Confirm Operation: After the light flashes, press the remote button again to test the door. The garage door should respond by opening or closing. If it does, the remote is now reset and synced with your Chamberlain opener.
- Repeat for Additional Accessories: If you have more Chamberlain remotes or a wireless keypad to program, you can do so immediately after. For each additional remote, press the Learn button again (the LED comes on), then press the new remote’s button. Remember that after about 30 seconds of no activity, the opener will exit learn mode, so you’ll need to press Learn button again for each device. Chamberlain openers can typically remember multiple remotes (the exact number varies by model, but often 5, 10, or even up to 20 devices).
Chamberlain Remote Reset Tips: The process above works for nearly all Chamberlain openers manufactured since the early 1990s. If your opener has DIP switches instead of a Learn button (very old models), see the section on older remotes with DIP switches in this guide. Also, ensure the remote’s batteries are good and that you’re standing within a reasonable range (within a few car lengths) when programming. If the opener’s light doesn’t flash in step 4, the remote’s signal might not have been received – try moving a bit closer, and make sure to press the remote button firmly. In some cases, electronic interference (from Wi-Fi routers or LED light bulbs in the opener) can disrupt the programming signal – we’ll address fixes for that in Troubleshooting.
How to Reset a Garage Door Remote Control For Craftsman ?
Sears Craftsman garage door openers are also manufactured by Chamberlain/LiftMaster, so their reset procedure is nearly identical to the steps above. The Craftsman openers (especially those made from the mid-1990s onward) have a Learn button on the motor unit that you’ll use to program or reset remotes. It may be labeled “Learn” or “SRT” (smart) on older units, and is usually located on the back panel of the opener, near the force adjustment dials or antenna wire. Here’s how to reset a Craftsman garage door remote control:
- Locate the Learn (Smart) Button: On the Craftsman opener motor, find the Learn button. Often, it’s on the back or side of the unit. You might need to remove the opener’s light lens cover to see it. It could be purple, orange/red, green, or yellow in color, just like Chamberlain models, or a small black button on very old units. Ensure you have a stable ladder and can reach the button safely.
- Erase Previous Codes (Optional): If you want to remove all prior remote codes from the opener (for security – e.g., a previous owner’s remotes, or a lost remote), press and hold the Learn button for ~6 seconds until the indicator light turns off. This clears all remote controls and keypad entries from memory. You’ll reprogram your remaining remotes in the next steps.
- Initiate Programming Mode: Now, press and release the Learn button once. The opener will go into programming mode. Typically, the unit’s courtesy light will come on (or the Learn LED will glow solid) to signal it’s ready to learn a remote.
- Press the Remote Control Button: Within 30 seconds of pressing Learn, press the button on your Craftsman remote that you wish to use for that door. Hold it for a moment, then release. The opener’s light should flash twice, and you may hear a click, indicating the remote was accepted.
- Verify the Remote Works: Test the remote by pressing the same button again – the garage door should now respond (opening or closing). If it does, the remote has been successfully reset/programmed to your Craftsman opener.
- Program Additional Remotes or Keypads: To add another remote or a wireless keypad, repeat the process: press Learn, then press the next remote’s button. Do this for each device you want to connect. Remember, if you exceed the opener’s memory capacity (often around 20 remotes maximum) the oldest stored remote may be overwritten – though in practice few households use that many transmitters.
Craftsman Opener Note: Older Craftsman openers from the 1980s or very early 90s may not have a Learn button. Instead, they use a set of DIP switches to set the remote code. Resetting those involves manually matching the switch pattern on the remote to the pattern on the opener’s receiver unit. If your Craftsman opener has DIP switches, open the remote’s battery compartment to access the switches, and find the similar DIP switch block on the opener (or external receiver) mounted on the ceiling. Make sure the tiny switches are toggled in the exact same pattern on both the remote and the opener. This matching of codes is how older units “learn” the remote. Once they match, test the remote to see if it activates the door. (If the door still doesn’t move, double-check the orientation of the DIP switches. Occasionally the switch module in the remote is reversed relative to the opener’s; if so, try flipping all switches to the opposite setting — up becomes down, and vice versa — to align the code properly.) For the majority of Craftsman openers with a Learn button, though, the earlier numbered steps will get your remote reset and working.
How to Reset a Garage Door Remote Control For Genie Openers ?
Genie garage door openers often feature a “Learn Code” or “Program” button to sync new remote controls. Resetting a Genie remote involves clearing the opener’s memory and then reprogramming the remote, which ensures that only your chosen remotes will operate the door. This is particularly useful if a remote is misplaced or if you need to stop an old remote from working. Genie’s programming process is slightly different from LiftMaster/Chamberlain’s, as it typically requires an extra press of the remote button during programming. Follow the guide below to reset your Genie garage door remote control safely and effectively.
Steps to Reset a Genie Remote (Intellicode Openers):
- Find the Learn/Program Button: First, unplug the Genie opener briefly and plug it back in (this can reset the unit’s electronics if needed). Then locate the Learn Code (also called Program or Learn) button on your Genie garage door opener. It’s usually a small, often recessed button. Many Genie models have this button behind the light lens cover on the motor unit; you might need to slide or lift off the plastic cover to access it. The button might be labeled “Learn Code” and have an adjacent LED indicator. On newer Genie units, the Learn button is sometimes colored (e.g., red or blue LED near it) and located on the bottom of the opener housing.
- Clear Existing Remote Codes (Factory Reset the Opener): To wipe all remote control codes from a Genie opener’s memory, press and hold the Learn Code/Program button. After about 5-6 seconds, the indicator LED will start blinking or turn off, indicating that the opener’s memory has been erased. Release the button once the light turns off. All previous remotes are now erased, and you’ll reprogram the ones you have. (On Genie models with a push-button wall console, you may also need to press and hold the wall console’s remote button in combination with the Learn button – consult your manual if holding the motor unit’s Learn button alone doesn’t clear the memory.)
- Enter Programming Mode: Press the Learn/Program button once (don’t hold it this time). The small LED on the opener will start blinking, indicating the unit is in programming mode awaiting a remote signal.
- Press Remote Button to Program: Within about 30 seconds of activating learn mode, take your Genie remote and press the button you want to use for that door once. Watch the opener’s Learn LED — on Genie openers, the indicator light will go from blinking to solid when it recognizes the remote’s signal. Now press the same remote button again to finish the programming. The indicator LED should either turn off or flash, then turn off, signifying the code has been stored. (This two-press sequence is unique to Genie’s programming process: the first press gets the opener to learn the code, and the second press confirms and saves it.)
- Test the Remote: Wait a few seconds, then press the remote button you just programmed to test the operation. The garage door should start moving. Congratulations – your Genie remote has been reset and is now controlling the door!
- Program Additional Genie Remotes: If you have more remotes to add, put the opener back into learn mode (press the Learn button again once) and repeat the two-press programming for each remote. For a wireless keypad, you would typically press the Learn button and then enter a PIN on the keypad and hit Enter to sync it – the exact steps can vary by model, so have the keypad’s instructions handy.
Genie Remote Reset Tips: Genie’s Intellicode openers (manufactured from the mid-1990s onward) use this learn-button programming method. If your Genie opener is very old (pre-Intellicode) and uses DIP switches in the remote, you would match the DIP switch pattern just like with older Craftsman units (set the toggles in the Genie remote to the same pattern as the receiver’s switches). For most users, however, the steps above will cover Genie remote resets. Always ensure your Genie remote’s battery is fresh and installed correctly. If the programming doesn’t “take,” try clearing the opener’s memory again and then carefully redo the steps, making sure you press the remote twice as instructed. Also, stand within a few feet of the opener when programming Genie remotes – sometimes being too far away can result in the signal not being received during the learning mode. After programming, you can usually operate the remote from much farther away (Genie remotes typically have good range once programmed).
Troubleshooting Tips for Garage Door Remote Resets
Even after following the brand-specific instructions, you might encounter situations where the remote still doesn’t work. Don’t worry – below are some troubleshooting tips to help you resolve common problems related to resetting or programming a garage door remote control.
- Check the Remote’s Battery: A very common reason a garage door remote fails to program (or stops working) is a weak or dead battery. If pressing the remote doesn’t even light up its little LED (if it has one), or if the range is very short, replace the battery and try again. Weak batteries can cause inconsistent remote performance, so this simple step often fixes the issue.
- Distance and Timing: When programming, be sure you are within a reasonable range of the opener – usually standing on a ladder right next to the opener is best. After pressing the Learn button, you typically have about 30 seconds (or up to 2 minutes on some newer models) to press the remote. Press the remote button deliberately and watch for the confirmation blink/click. If you wait too long, the opener will exit learn mode and not learn the remote. Simply press Learn again and repeat, if needed.
- Garage Door Opener “Lock” Mode: Many wall-mounted garage door control panels (especially on LiftMaster/Chamberlain/Craftsman openers) have a Lock or Vacation switch. If this is activated, all remote controls will be disabled even if they are programmed correctly. Check your wall console for a lock button or LED indicator – if the lock is on, turn it off (usually by holding the lock button for 2 seconds). This might instantly restore remote function.
- Safety Sensor Issues: Misaligned or obstructed safety sensors won’t typically prevent the remote from programming, but they can prevent the door from closing (the door might start closing and reverse or not move at all). Ensure the sensor eyes near the base of the door tracks are aligned (the small indicator lights on them should be steady and not blinking). If your remote seems to program (the opener clicks) but the door won’t budge when you press it, check the sensors. Realign any blinking sensor and clear any obstruction. Also, make sure the door isn’t physically locked or stuck.
- Interference and Range Problems: Radio frequency interference can disrupt the communication between your remote and the opener. Recently installed LED light bulbs in the opener or near the garage may cause interference with the remote’s signal. If you’ve installed new light bulbs in the opener, try replacing them with garage-door-opener-friendly bulbs (some LEDs are designed to minimize RF interference). Other sources of interference include Wi-Fi routers or devices operating on similar frequencies. If you suspect interference, try programming the remote with all possible sources of interference (and the opener’s light) turned off. Also, ensure the opener’s antenna wire is dangling downward and not damaged – a damaged or tucked-in antenna can greatly reduce range.
- Opener Memory Limit: Although uncommon for a home user, if the opener’s memory for remotes is full, it may not accept new remotes until you clear it. If you have many remotes/keypads programmed, consider clearing all codes (holding the Learn button until lights go out) and then reprogramming only the ones you need.
- Reset and Power Cycle: When all else fails, try a power cycle of the system. Unplug the garage door opener unit (or turn off its circuit breaker) for about 30 seconds, then plug it back in. This can reset the opener’s internal electronics. After restoring power, attempt the remote programming process again. In some cases, this can clear any electronic glitches that were preventing programming.
- Compatibility Check: Ensure your remote control is compatible with your opener. Using an incorrect remote (e.g. a random remote you found or a different brand’s remote) will not program. Check the model numbers – for instance, a Chamberlain/LiftMaster remote with Security+ 2.0 will not work on an older Security+ 390 MHz opener, and vice versa. If you bought a universal remote, be sure to set it to the correct brand/mode per its instructions before programming.
- Mechanical Issues vs Remote Issues: If your opener clicks or the lights flash when you press the remote but the door doesn’t move, the remote is likely programmed fine – the problem may be mechanical (e.g. a broken spring or trolley disengaged). In that case, you might notice the door operates from the wall switch but not via remote. If the wall button also doesn’t move the door, check if the door is stuck or the opener is in an error state. Listen for the motor hum or watch LED blink codes on the unit to diagnose. For any complex issues (like a motor that just clicks and doesn’t run), you may need to consult a professional.
How to Reset a Garage Door Remote Control if It Still Won’t Work
If you’ve tried all of the above and your garage door remote still won’t program or operate, here are a few additional steps and considerations on how to reset a garage door remote control in stubborn cases:
- Double-Check the Procedure: Go through the step-by-step instructions for your specific opener brand one more time. It’s easy to miss a timing window or not press a remote button firmly. Watching a quick online video for your exact model can reinforce the process (just ensure the video is for the same model or technology).
- Use a Different Remote Button: If your remote has multiple buttons, try programming a different one. Sometimes one button might have been previously paired or could be faulty. Using another button can isolate whether the remote itself has an issue.
- Replace the Remote: It’s possible the remote control itself is defective. If you have a second remote, try programming that one to see if it works. If it does, your original remote may need replacement. Replacement remotes are available for all major brands – just make sure to get one compatible with your opener model/year.
- Contact Support or a Professional: As a last resort, reach out to the manufacturer’s customer support or a local garage door service. They can often walk you through model-specific tricks or diagnose issues (for example, some openers have blinking LED diagnostic codes that could indicate why the programming isn’t completing). A professional can also inspect your opener for hardware issues like a faulty receiver board.
By systematically going through these troubleshooting tips, you should be able to get your garage door remote reset and working. Most problems ultimately boil down to battery, range, or a missed step in programming, and those are easily fixed with a fresh battery or retrying the procedure.
Conclusion
Resetting a garage door remote control is a straightforward process that enhances your security and convenience. Whether you have a LiftMaster, Chamberlain, Craftsman, or Genie opener, the core idea is the same: clear the old codes and teach the opener to recognize the remote’s signal. In this guide, we’ve shown you how to reset a garage door remote control step by step for each major brand, and provided troubleshooting advice for common hiccups. By following these instructions, you can ensure that only the remotes you program will operate your garage door, keeping your home safe (especially important if you’ve moved into a new house or lost a remote). Always remember to exercise caution when working on a ladder and around garage door machinery. With your remotes reset and working properly, you’ll regain reliable access to your garage at the push of a button.