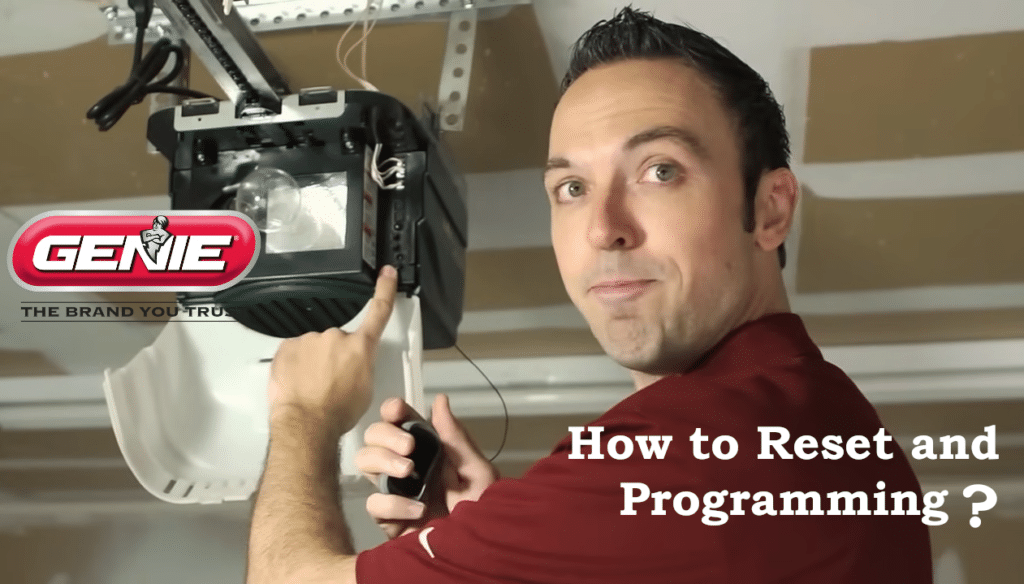
Having your Genie garage door opener suddenly refuse to open or close can be frustrating, but many of these issues can be fixed with some methodical troubleshooting. This guide will walk you through clear, step-by-step instructions to diagnose and resolve common problems – focusing strictly on troubleshooting (not routine maintenance or sales pitches). We’ll cover all the usual suspects: power supply problems, remote control and wall switch malfunctions, safety sensor issues, travel limit misadjustments, motor or gear failures, and even the emergency release. By the end, you should either have your garage door moving again or know if it’s time to call in a professional. Let’s get started!
1. Ensure the Genie Opener Has Power (Power Source Problems)

The first thing to check is the opener’s power source. It sounds simple, but a surprising number of garage door issues trace back to the unit not getting power. Without power, nothing will work – no lights, no motor sound, and certainly no movement. Here’s what to do:
- Verify the outlet: Make sure the Genie opener is plugged in securely, and test that electrical outlet. Plug a lamp or another device into the same socket to confirm it has power. Sometimes an outlet in the garage can trip due to an overload or GFCI issue.
- Check the circuit breaker or GFCI: If the outlet has no power, go to your electrical panel and see if the circuit for the garage or opener is tripped. Reset any tripped breaker. Likewise, if your opener is plugged into a GFCI outlet (common in garages), that outlet might have tripped – press the reset button on the outlet and test again.
- Inspect visible indicators: Many Genie openers have indicator LEDs on the motor unit. If no lights are lit on the opener at all, that’s a clue it’s not receiving power. If there was a recent power surge or lightning storm, it’s possible the opener’s internal fuse or circuit board was damaged, especially if everything else checks out. In such cases, you may need a professional to replace the circuit board or the entire unit.
- Use manual mode if needed: Until power is restored, remember you can pull the emergency release cord to operate the door by hand. This won’t fix the opener, but it will at least let you open or close the door manually in the meantime.
Ensuring the opener has a reliable power supply is the foundational step – once you know it’s powered, you can move on to the control systems.
2. Check the Remote Control and Wall Switch Malfunctions
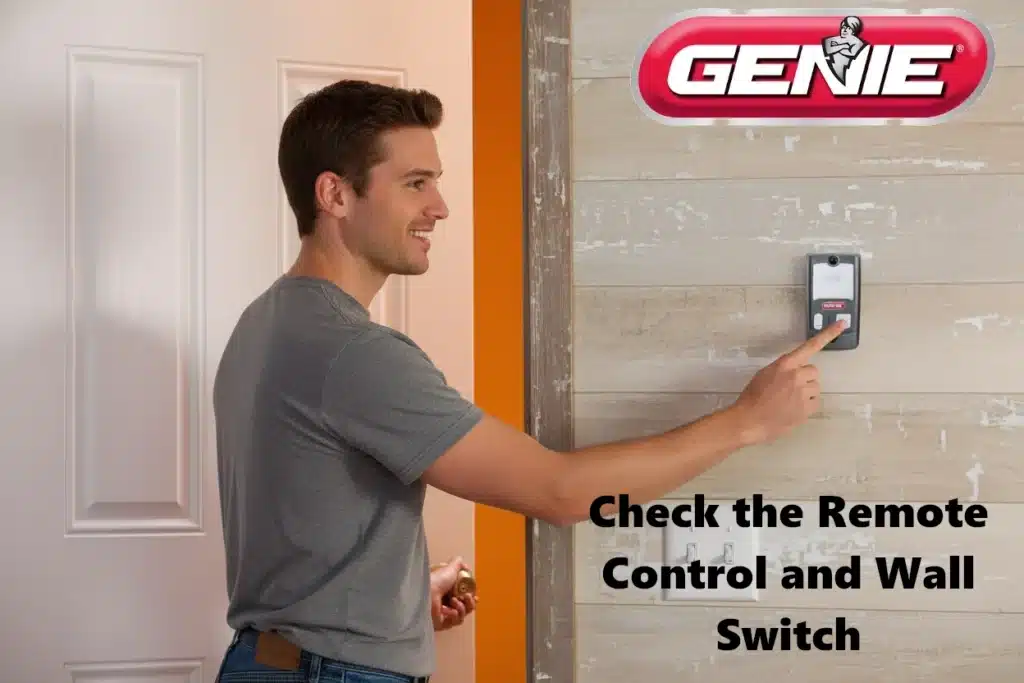
If the opener has power but still isn’t budging, the next things to rule out are issues with the controls – namely, your remote transmitters and the hardwired wall switch (wall console). Problems with these can prevent the opener from getting the signal to run.
Test both the remote and the wall button: Determine if either control works to operate the door. This helps isolate the problem:
- If neither the remote nor the wall switch works: and you’ve confirmed the opener has power, skip ahead to sensors and other issues. But if one works and the other doesn’t, focus on the one that’s not functioning.
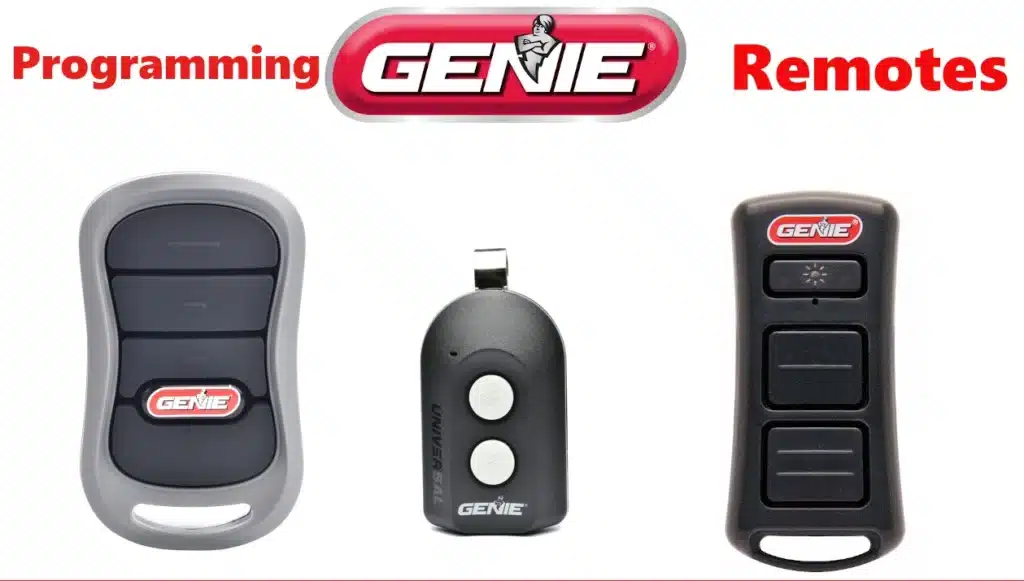
Remote Control Issues – Start with your Genie remote if it’s not responding:
- Replace the remote battery: It may sound obvious, but a dead battery is a top cause of unresponsive remotes. Genie remotes often use coin-cell batteries (like CR2032 or an A23 12-volt, depending on the model). Try a fresh battery first.
- Proximity and interference: Make sure you’re within range of the door and that the opener’s antenna wire (hanging from the motor unit) is not damaged and is pointing down. If the remote works only at very close range, there might be radio frequency interference. Nearby devices or even LED light bulbs in the opener can interfere with the signal. Remove or turn off any suspected sources of interference and test again.
- Reprogram the remote: If a new battery didn’t help, the remote might have lost its coding. Consult your Genie opener’s manual for the programming steps (usually involves pressing a “Learn” button on the unit, then pressing the remote button). Re-syncing the remote can often restore functionality if it was accidentally erased from the opener’s memory. If reprogramming doesn’t work, the remote itself could be faulty – try a spare remote if you have one, or consider replacing the remote.
Wall Console / Wall Switch Issues – Now, if pressing your wall-mounted control doesn’t do anything (but the remote does):
- Vacation lock: Many Genie wall consoles have a lock switch (often labeled Sure-Lock on newer models). When activated, this feature disables the remote and keypad for securitys. If your remotes won’t work but the wall button still operates the door, check that the wall console isn’t in “locked” mode – there’s usually an LED or a slider that indicates this. Switch it back to unlock and try the remote again.
- Loose wires or bad connections: If the wall button does nothing at all, inspect its wiring. Remove the wall switch cover and ensure the two wires are firmly attached. Also check where those wires connect on the opener’s terminals. It’s not uncommon for a wire to come loose or break, especially if it was stapled poorly or damaged over time. Gently tug each wire at the opener terminal to see if it’s secure. Tighten any loose screws clamping the wires, or re-strip and reattach a wire that has come out.
- Bypass test: For a basic doorbell-style wall button, you can test the circuit by shorting the terminals at the opener unit. Use a screwdriver to carefully touch both the wall button terminals together (or touch the two wires together) – this mimics pressing the button. Be cautious: keep clear of the moving door when doing this. If the door activates when you short the terminals, the wall button or its wires are at fault. You might have a broken button (internally worn contacts) or a break in the wire. Replacing the wall button is usually inexpensive (even a generic doorbell button can work in a pinch), or repair the wiring if you find a defect.
- “Smart” wall console issues: If you have a Genie wall console with lights or special functions, the simple short test might not work due to electronic circuitry. In that case, after verifying the wiring is secure, the best troubleshooting step is to try a replacement wall console (if available) or consult Genie support. Often, if power is going to the wall console (some have an LED that glows normally) but it still doesn’t trigger the door, the console’s circuit board could be dead. Replacing it is the solution.
By verifying the remote and wall switch, you’ll either fix the control issue or move on knowing the problem lies elsewhere. Always rule out the simple stuff (dead batteries, locked console, loose wires) before assuming something major is wrong.
3. Inspect the Safety Sensors for Misalignment or Obstruction
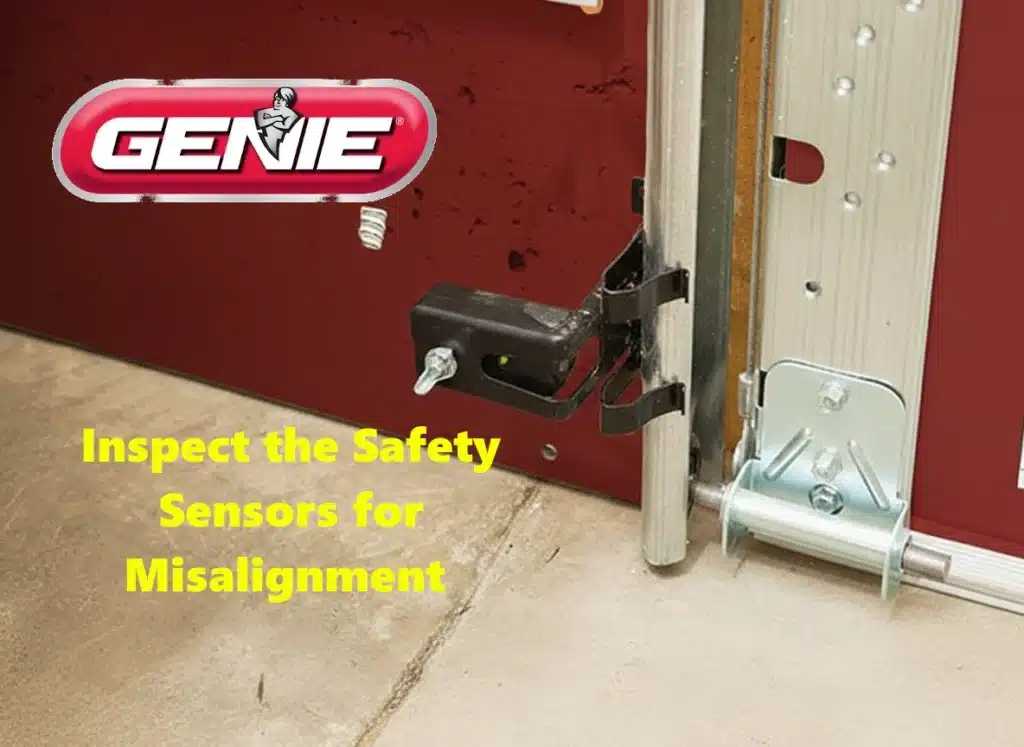
If your garage door won’t close, one of the most common causes is a problem with the safety sensors (Genie’s Safe-T-Beam system). These photo-eye sensors are located at the base of the door tracks on both sides, about 4-6 inches off the floor, and they shoot an invisible beam across the doorway. This is a critical safety feature: if the beam is interrupted (or the sensors aren’t working), the opener will typically stop or reverse to prevent crushing anything under the door. Here’s how to troubleshoot sensor issues:
- Identify sensor symptoms: If the door refuses to close using the remote, observe the opener unit – does the garage door opener light blink or flash? On Genie openers, a blinking light often means the sensors are detecting something (or think they are). Another telltale sign is if the door only closes when you hold down the wall button continuously (this is a manual override for a sensor problem). These clues point to the sensors being the culprit.
- Check for obstructions: Make sure nothing is actually blocking the sensor beams. Even small objects, debris, or cobwebs can break the beam. Dirt or spider webs on the sensor lens can also simulate an obstruction. Clean any debris around the sensors and gently wipe the sensor lenses with a soft cloth to ensure they’re clean.
- Align the sensors: Each sensor (one sends the beam, the other receives) must be aimed directly at each other to work. If they get bumped, the alignment might be off. Look at the sensors: each should have a little LED light – on Genie Safe-T-Beams, one will be red and one green. When properly aligned and powered, both LEDs will be on solid (not blinking). If one or both lights are off or flickering, they are misaligned or not getting power. Loosen the wing nut or screw holding the sensor bracket, adjust the sensor up/down or side-to-side until the LED glows steady, then re-tighten it. It sometimes helps to line them up by eye (make sure they point straight at each other at exactly the same height from the floor).
- Eliminate sunlight issues: Direct sunlight shining into a sensor can confuse it. If your garage faces bright sun at certain times, and the door won’t close in daylight but works at night, this could be the cause. You can test this by shading the sensor with your hand to see if the steady light returns. Genie’s newer sensor models have sun-blocking hoods to reduce this issue. As a DIY solution, you might rig a small piece of cardboard as a sun shield over the sensor. Ultimately, if this is a persistent problem, consider upgrading to the newer GSTB-R Safe-T-Beam sensors which have built-in sun interference resistance.
- Verify wiring and power: If the sensor lights are completely off on one or both sides, you could have a wiring issue. Ensure the thin sensor wires haven’t been cut or disconnected (a ladder, rake, or even a rodent can damage these wires). Each sensor has two wires; they connect to the opener’s terminal screws (usually marked “sensor” or similar). If a wire is loose or broken, the sensor won’t have power. Reattach any loose wires, using wire nuts or terminal screws as needed. If a wire is damaged, you may need to splice in a new section or replace it.
- Test the door: After cleaning and aligning, test the door with the remote. It should close normally if the sensors were the issue. If it still doesn’t, try the wall button hold trick again: hold down the wall button to force the door to close. If it closes with the override, that confirms a sensor problem persists. In that case, the sensors themselves might be defective. They do fail occasionally, especially if older or water-damaged. Replacing the sensors is usually simple and not very expensive – Genie sensors are typically sold in pairs and can hook up to your existing wiring and brackets easily. Install new sensors, align them, and you should be back in business.
Safety sensors are a frequent source of trouble when the door won’t close, but the fixes (cleaning, aligning, rewiring) are straight-forward. Just remember, the sensor system is there for safety – never bypass it except as a quick test, and restore it to proper operation to keep your family and pets safe.
4. Adjust the Limit Switches (Travel Limit Misadjustment)
Does your garage door start to close, reach the floor or nearly so, and then immediately reverse back up? Or does it refuse to fully open or close all the way? These behaviors often point to a limit switch misadjustment (also known as the travel limit settings). The opener is “thinking” the door’s travel is complete or encountering an obstacle when it actually isn’t. Genie openers, like others, have adjustable limit settings that tell the motor when to stop running at the open and closed positions. If these are set wrong, the door can stop too early or late.
Common signs of misadjusted limits include: the door reversing when closing (because the opener hits the floor and thinks it’s an obstruction due to over-travel), or the door not reaching the floor (leaving a gap) or not opening all the way.
Here’s how to address limit issues:
- Understand the controls: Depending on your Genie model, the limit switches might be mechanical screws or dials on the side or back of the unit, or they might be set via electronic controls (buttons you press in a certain sequence). Check your owner’s manual for specifics on your model’s limit adjustment procedure. On many Genie chain or belt drive units, there are two plastic adjustment screws – one for the Down/Close limit and one for the Up/Open limit.
- If door reverses when closing (hits floor and goes back up): This usually means the down limit is set too far. In other words, the opener thinks the door needs to travel more than it actually does, so it pushes against the floor, encounters resistance, and the safety system kicks in and reverses the door. To fix this, decrease the down travel. Locate the down limit screw and turn it in the direction that reduces travel – often marked “-” or labeled to reduce the down limit. Turn it only a small amount (e.g. one quarter-turn). Then test the door: if it now closes and stays closed, you’ve solved it. If it still reopens, adjust a bit more. You want the door to just hit the floor with a minimal seal, without significant force.
- If the door won’t close fully: (stops short of the floor), you need to increase the down limit. Turn the down limit adjustment the opposite way slightly (to allow more travel) and test again until the door closes snugly but doesn’t strain against the floor.
- If the door won’t open fully: find the up limit control. If the door stops too low (not reaching the header), increase the up limit so the opener knows to lift a bit higher. Conversely, if it tries to open too far, you’d decrease it. Adjust in small increments and test.
- Button-set limits: For newer Genie models with electronic limit setting (often those with “IntelliCode” or digital setups), you usually press and hold a set button and use the remote or door control to jog the door to the desired positions. Then you save the setting. If your limits are off, it might be worth redoing the limit setup from scratch. Genie support has videos and instructions on setting limits with just a few button presses – often it’s as simple as running the door to the desired open position, storing it, then to the closed position and storing it.
- Fine-tuning: After any adjustment, cycle the door a couple of times. Observe if it’s closing solidly without slamming and opening fully without hitting the opener’s stops. Make further small tweaks as necessary. Properly set limits ensure the door doesn’t strain the opener or itself by over-traveling.
Misadjusted limits can happen over time (screws can slip or vibration can cause settings to drift) or after mechanical changes to the door. Thankfully, correcting them is usually quick and gets your door operating smoothly again.
5. Examine the Motor and Drive Gear (Motor or Gear Failure)
If you’ve gone through the steps above and the garage door opener still won’t operate the door, there may be a more significant mechanical or electrical issue inside the opener itself. Motor or gear failure can prevent the door from moving even when the opener is powered and trying to work. Here’s how to troubleshoot these deeper issues:
- Listen to the opener when you press the control: Do you hear the motor hum or buzz, even though the door doesn’t move? A humming motor with no movement is a classic sign of a drive gear failure. Inside the opener, a plastic (or nylon) gear connects the motor to the chain, belt, or screw drive. If that gear is stripped or broken, the motor spins but cannot drive the door, often producing a humming sound. If you hear a grinding noise, that could also indicate a worn gear or sprocket skipping teeth.
- Inspect for obvious drive issues: If it’s safe, stand on a ladder and look at the opener’s drive mechanism (with the power off). For chain drive or belt drive models, see if the chain/belt is hanging slack or if a sprocket on top of the motor unit is broken. A broken chain or belt is obvious – the opener will run but the door won’t be connected. If the chain is slack, the internal gear may be worn (or the chain simply needs tightening via its adjustment screw).
- Look for plastic shavings: Sometimes you might find white or yellow plastic shavings inside the opener housing or on top of the motor unit – this is debris from a shredded drive gear. That’s a sure sign the gear stripped out.
- Door moves a little, then stops: If the motor tries briefly and then stops (maybe with a clicking sound), it could be a gear problem or even a burnt-out motor capacitor (for AC motors) not giving it the kick to start. Capacitor issues are a bit harder to diagnose without specific tests, but it’s another possibility if the motor just hums and doesn’t run.
- Testing with door disconnected: You can pull the emergency release to disconnect the door and then press the opener. If the motor runs and the trolley carriage moves along the rail normally with the door disconnected, that means the opener itself is okay and the problem lies with the door mechanism (e.g. a heavy door or spring issue, see below). But if the opener still struggles or the trolley doesn’t budge even with the door detached, the problem is within the opener (gear, motor, etc.).
- Broken spring check: Garage door springs do the heavy lifting – the opener just guides the door. If a spring is broken, your opener might not open the door (it will be extremely heavy) or it may lift a few inches and then stall or reverse. You might notice the opener “surging” or straining. Check above your door for the torsion spring (or along the tracks for extension springs). Do NOT remove any spring but visually you might see a gap in a torsion spring if it’s broken. Also, manually lift the door (with the opener released) – if it’s almost impossible to lift or won’t stay up, you likely have a broken spring. In this case, stop using the opener immediately to avoid burning out the motor, and call a professional to replace the spring. (Spring replacement is dangerous due to high tension – not a DIY job.)
- Gear or motor repair: If you confirm a stripped gear is the issue, you can get a gear replacement kit for many Genie models. Replacing it involves opening the opener case, removing the old gear and installing the new one with proper grease. It’s a moderately advanced DIY fix – if you’re comfortable with tools and following detailed instructions, give it a try; otherwise a garage door technician can do it relatively affordably. Likewise, a fried motor or circuit board is something a technician should handle. For instance, if a lightning strike or power surge fried the board, the opener might behave erratically or not respond at all, and swapping in a new circuit board could be the remedy.
- Overheating or overload: Note that Genie openers (especially older ones) have thermal protection. If you’ve been trying repeatedly to run it, the motor could overheat and temporarily shut down. Wait 10-15 minutes and try again. If it works after cooling off but frequently overheats, something is causing excessive strain – possibly an unbalanced door or an internal problem.
- When to call a pro: If you suspect a motor failure, a bad circuit board, or you’re not comfortable digging into the opener’s internals, it’s time to call a professional. They have the expertise to test the motor, replace circuit boards, or identify an internal mechanical failure safely. Also, if your opener is an older model, consider that investing in a new unit might be more cost-effective than an extensive repair, especially once you factor in parts and labor.
In summary, motor and gear issues are less common than the earlier problems, but they do occur, especially in openers that have many years of service. They often manifest as the opener making noise like it’s working, but the door isn’t moving. Pay attention to those clues – they’ll guide you to the specific cause and remedy.
6. Re-engage the Emergency Release (Door Disconnected)
Last but not least, the issue might not be a failure at all – the garage door could simply be disconnected from the opener. This happens if someone pulled the emergency release cord (that usually-red handle hanging from the opener’s trolley carriage). When pulled, this lever disengages the door from the opener, allowing you to manually move the door. It’s very useful during power outages or if the opener malfunctions, but it needs to be re-engaged for normal operation.
Signs of an disengaged emergency release include: you press the opener, the trolley on the rail moves and the motor runs, but the door stays put. Or you might hear the opener running with unusually fast movement but no door motion. Essentially, the opener is “traveling” without the door. Here’s how to fix it:
- Check the position of the trolley carriage: Look along the rail for the trolley (the part that the chain/belt or screw drives). Attached to it is the part that connects to the door arm. If the door is disconnected, that attachment point will be separated. You might even see the hook that the cord is attached to hanging down. Also, the rope might be at a different angle (hanging downward means engaged; if it’s pulled back toward the motor, it might be in released position).
- Reconnect the opener to the door: First, if the door is open, gently close it by hand (for safety, do this carefully – the door could slam down if a spring is broken or the door is heavy, so ideally have another person help or prop it if needed). With the door closed, take the red cord and pull it toward the door and down – basically, towards the door opening, not toward the motor. On Genie openers, you often hear a “click” when the spring-loaded carriage re-engages. Some models might require you to also move the door a bit until it clicks in.
- Alternative method: In many cases, you can also just hit the remote or wall button after you’ve closed the door, and the trolley will slide until it latches onto the carriage automatically. But if it doesn’t, the manual pull method above should do it.
- Verify engagement: Once you hear that click or see that the opener’s trolley is hooked back onto the door arm, try the opener again using the remote or wall control. The opener should once again lift the door. If it still just whirs without moving the door, the carriage might not have latched. In that case, make sure the carriage lever (where the red cord attaches) is in the “engage” position (usually flipped down) – you might need to pull the cord harder until it snaps into place.
- Why it happened: The cord may have been pulled intentionally (during a power outage or by a curious child) or sometimes it can be accidentally tugged if something catches on it. Occasionally, a very hard impact (like the door hitting an object) can jostle the mechanism loose. After re-engaging, your opener should be back to normal. It’s a good idea to only use the emergency release for real emergencies and to re-engage it right after manual use so you don’t forget.
An unengaged emergency release is essentially a non-issue once you identify it – no parts to fix, just a reconnection to make. It’s one of those “aha!” fixes that’s satisfying because it’s simple. Just remember, whenever your opener seems to run but the door isn’t moving, check that that little lever hasn’t been pulled!
Conclusion
Troubleshooting a Genie garage door opener that won’t open or close involves a series of systematic checks – from the most basic (is it plugged in?) to the more involved (gears and circuit boards). By covering the bases of power supply, remote and wall control functionality, sensor alignment, limit settings, mechanical drive components, and the emergency release, you can resolve the majority of common issues on your own. Homeowners who are reasonably handy and follow safety precautions can save time and money by fixing many of these problems without a service call.
That said, always keep safety in mind. If you encounter a serious issue like a broken spring or cable, or the door is binding in the tracks, those are potentially dangerous to handle yourself. Springs, in particular, are under high tension – if you suspect a spring is broken or out of balance, it’s best to contact a garage door professional Near you and do not use the opener until it’s fixed. Similarly, if your opener’s motor is unresponsive or you smell something burnt on the circuit board, professional diagnosis is wise.